

This sweater was very much inspired by the Damask Jumper made by One Small Stitch. Up till now I've never really been tempted to try any colour work in my knitting - well maybe the odd stripe or two, but I look at the fair isle patterns and whilst I like them they're not really my style so I've never bothered with them.
But then I saw this damask design and really loved it and decided that maybe I should have another think about this colour work idea. I've been wanting to knit a black sweater lately, they're just so versatile and my wardrobe is really lacking that, but I could never bring myself to knit a plain black sweater - how boring would that be, so when I saw the damask sweater I got an idea. How about a plain black sweater with a design on the front in colour.

I knew from the start that I was never going to find a knitting pattern to match what I wanted so instead I just started searching for design ideas. I kept coming up blank so I sat down with a pencil and paper to see what I could come up with. What I came up with was this.

Now I had to figure out how to translate this design into stitches that could be knitted. I grabbed my chart paper and started colouring in.

The result wasn't exactly the same, but it had potential.
Next I had to figure out how to apply it to a sweater. I decided to go with a basic V neck, top down, raglan sweater as that's what I know best. I bought a ball of the wool that I had decided on, knitted up a quick swatch to determine what size needles and what my gauge would be, then I got down to some serious maths. I calculated how many stitches I would need, how many rows, where I needed increases and decreases etc and fully wrote out the pattern for my new sweater line by line. Once I knew how many rows and stitches I would need for the front of my sweater I started sticking together sheets of my graph paper and sketching out the outline of the sweater front. One square for each stitch.

I started with one pattern repeat right in the center just under the V and then played around with adding repeats of the elements to fill up the front area and now I had a pattern.
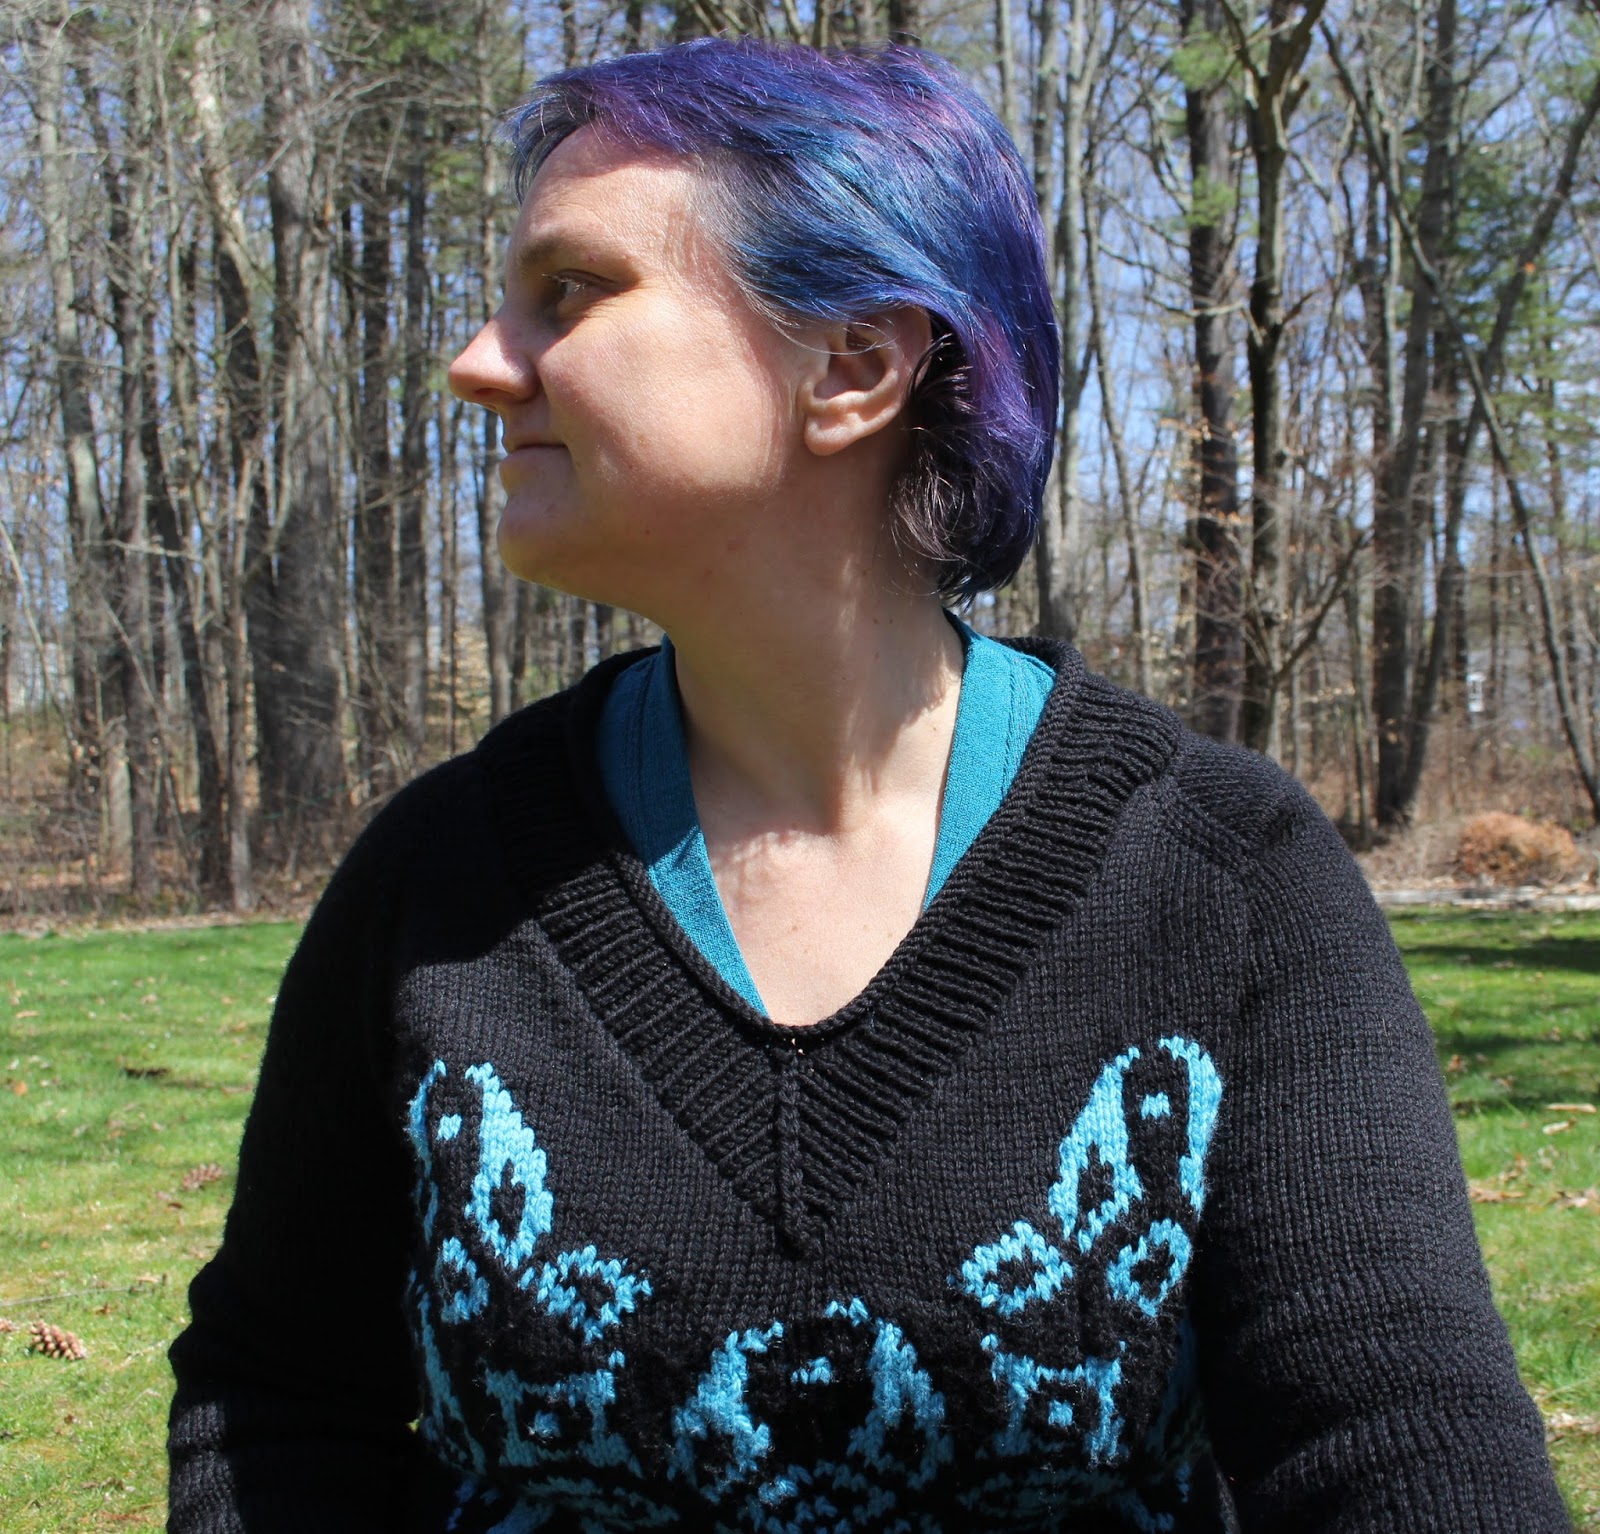
A few more calculations and I had an estimate on how much wool I would require so I could finally go out and buy my wool. I decided to go with Rown 100% superwash wool in Black and Azure. This is a worsted weight wool with a beautiful feel to it - we will see how it goes with pilling after I've worn it a time or two.
The only real problem that I had with this project was figuring out how to get the wool back to the start of each row. Due to the fact that the sweater was knit in the round, but the blue is only on the front, in order to get the wool back to the start of each row I had to carry a float right back across the length of the front. To reduce the length of the floats a bit I used two balls of the blue and worked one ball across the first half of the sweater to the center and then a second ball from the center to the other side, but that still left an awful lot of long floats. At the very end of the project I had to go back and using black thread stitch down all the floats so that they weren't flapping around.

If I were to go back and do this again I think I would split my wool into 4 or 5 balls and work each element of the design with a separate ball.

The bottom band was knit as a 2x2 rib all in black but for the cuffs I added two rows of the blue to the ribbing for a little pop of contrast on the sleeves.

The neck band was knit last with a 1x1 rib in the black with a double decrease in the center of each row. As the neck opening had turned out much larger than I anticipated, after the first couple of rows of ribbing I switched down a needle size to really bring the neckband in.
I also added about 4 short rows around the back of the neckline to bring the back neckline up higher.

After 10 full rows of ribbing I switched to a smaller needle size yet again and also switched to plain knit stitch for 4 rows to produce a neat rolled edge at the edge of the neckband.
I'm very happy with how this turned out. The colour work itself is probably not the best example in the world, but for my first real attempt I'm more than happy with it.


You are fearless!!!! Also, great hair color.
ReplyDeleteThanks - I figure you'll never know what you can do till you try. I've definitely had many projects go awry over the years.
ReplyDeleteBeautiful! the knitted design looks fabulous, and it goes with your hair beautifully!
ReplyDelete