Of course I said yes. A few things got in the way and we had to wait a while before we got started, but finally yesterday I delivered her the finished product.

The first step to creating the garment was finding the right pattern. I printed out many different options for patterns for her to chose from, but none of them were perfect. None that is till I raided my mums pattern stash. In there I found Butterick Pattern 5944.

View B was almost exactly what Kathy and I were looking for, The only modifications I had to make were to add pockets and a lining.
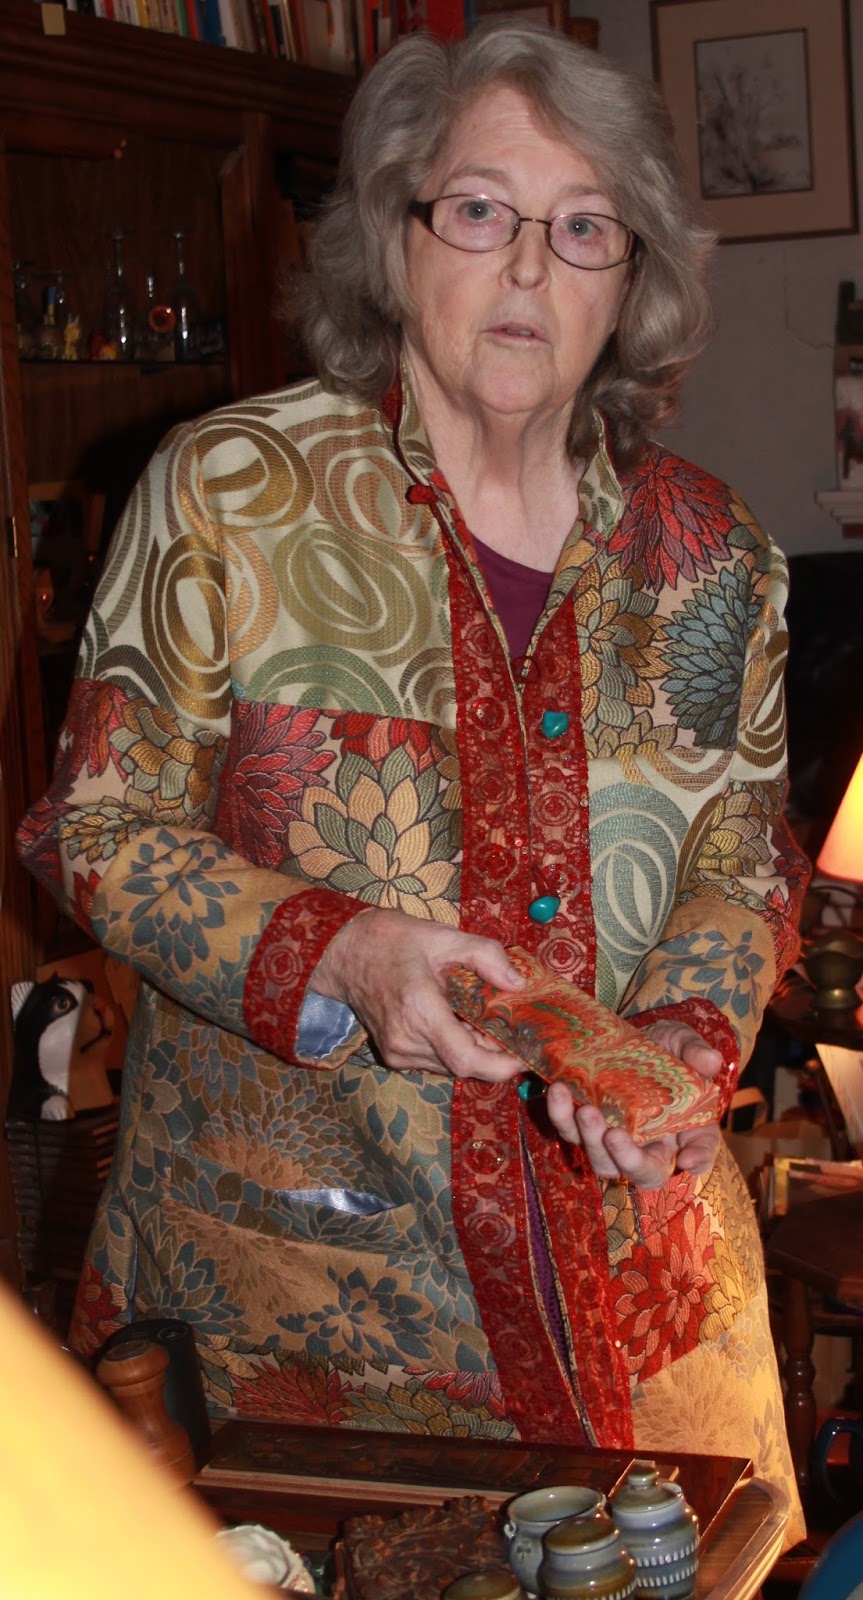
Then it was shopping time. The coat in the original picture was a patchwork of three different materials. a green fabric with red flowers and patterns, Another more olive green with gold patterning and a contrasting turquoise blue material. Kathy and I decided that we would try and stick with this colour palette of red, green, gold and blue as much as possible.
A trip to my local discount place found me a couple of materials that I thought might work. The first was a heavy weight cotton material with a neutral background colour, covered in flowers in shades of red, purple, orange, blues and greens.

One of the things I loved about this materials was that it was reversible, with the back side being the same flower pattern in shades of blues and golds/browns. A perfectly coordinating fabric combination.
I then found a another piece of fabric with a blue, green and gold swirl pattern to tie it all together.

Thankfully Kathy loved my selections so we were good to go.
I started by making a muslin. I used some horrible grey green heavy cotton material that I had bought on sale for exactly that purpose and made up a straight size 18. After the first fitting we decided 18 was just a smidge too wide across the shoulders and a smidge too small across the hips. I modified the pattern accordingly to fit and I was ready to get started on the real thing.
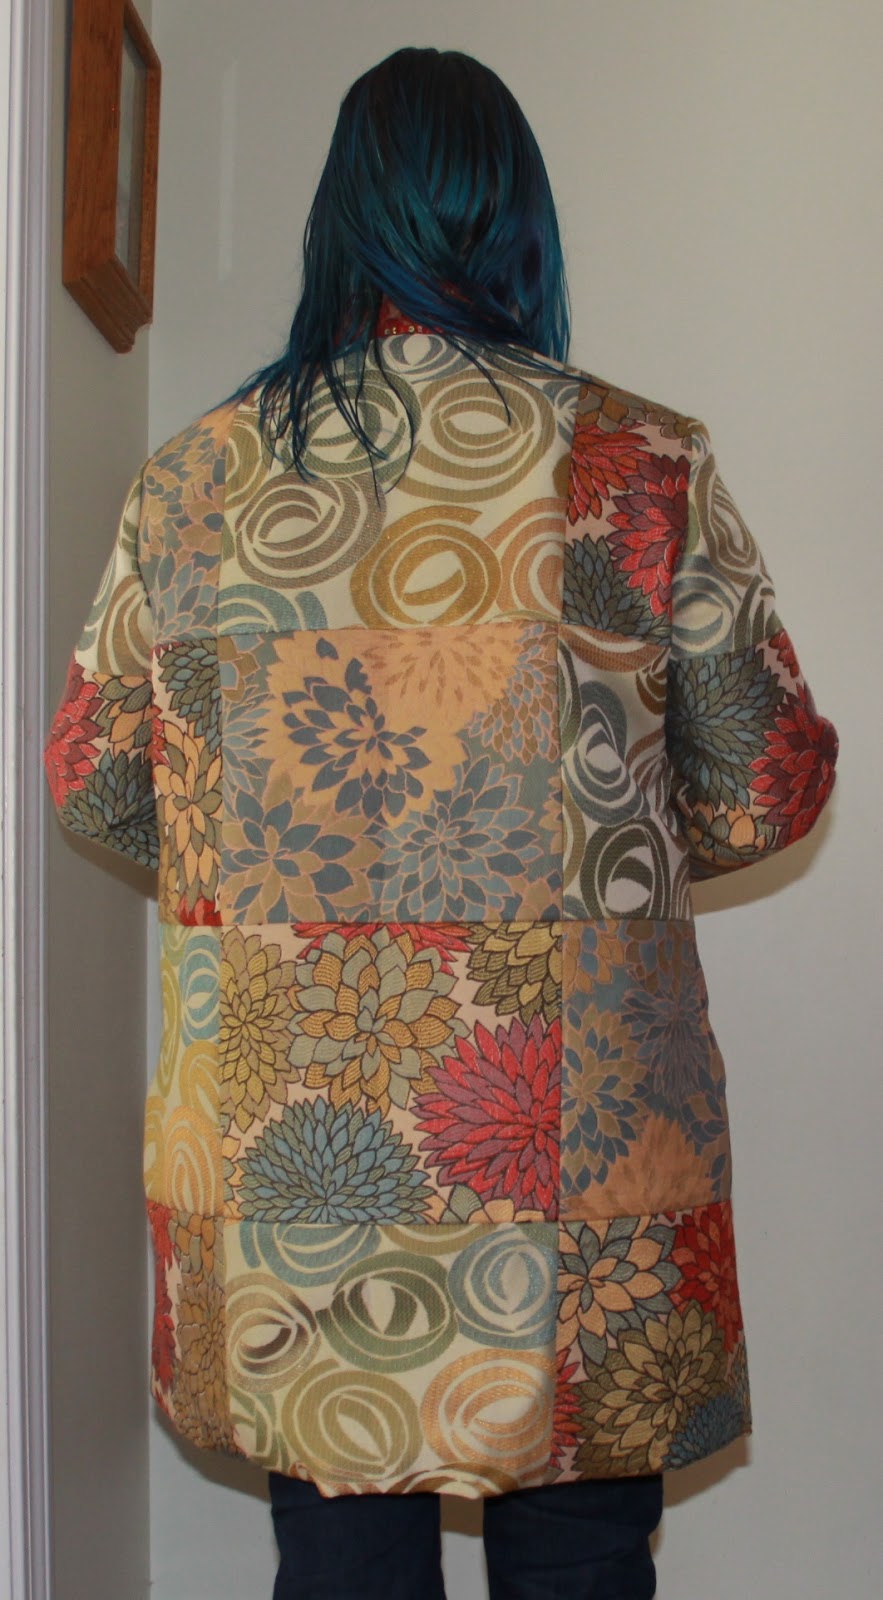
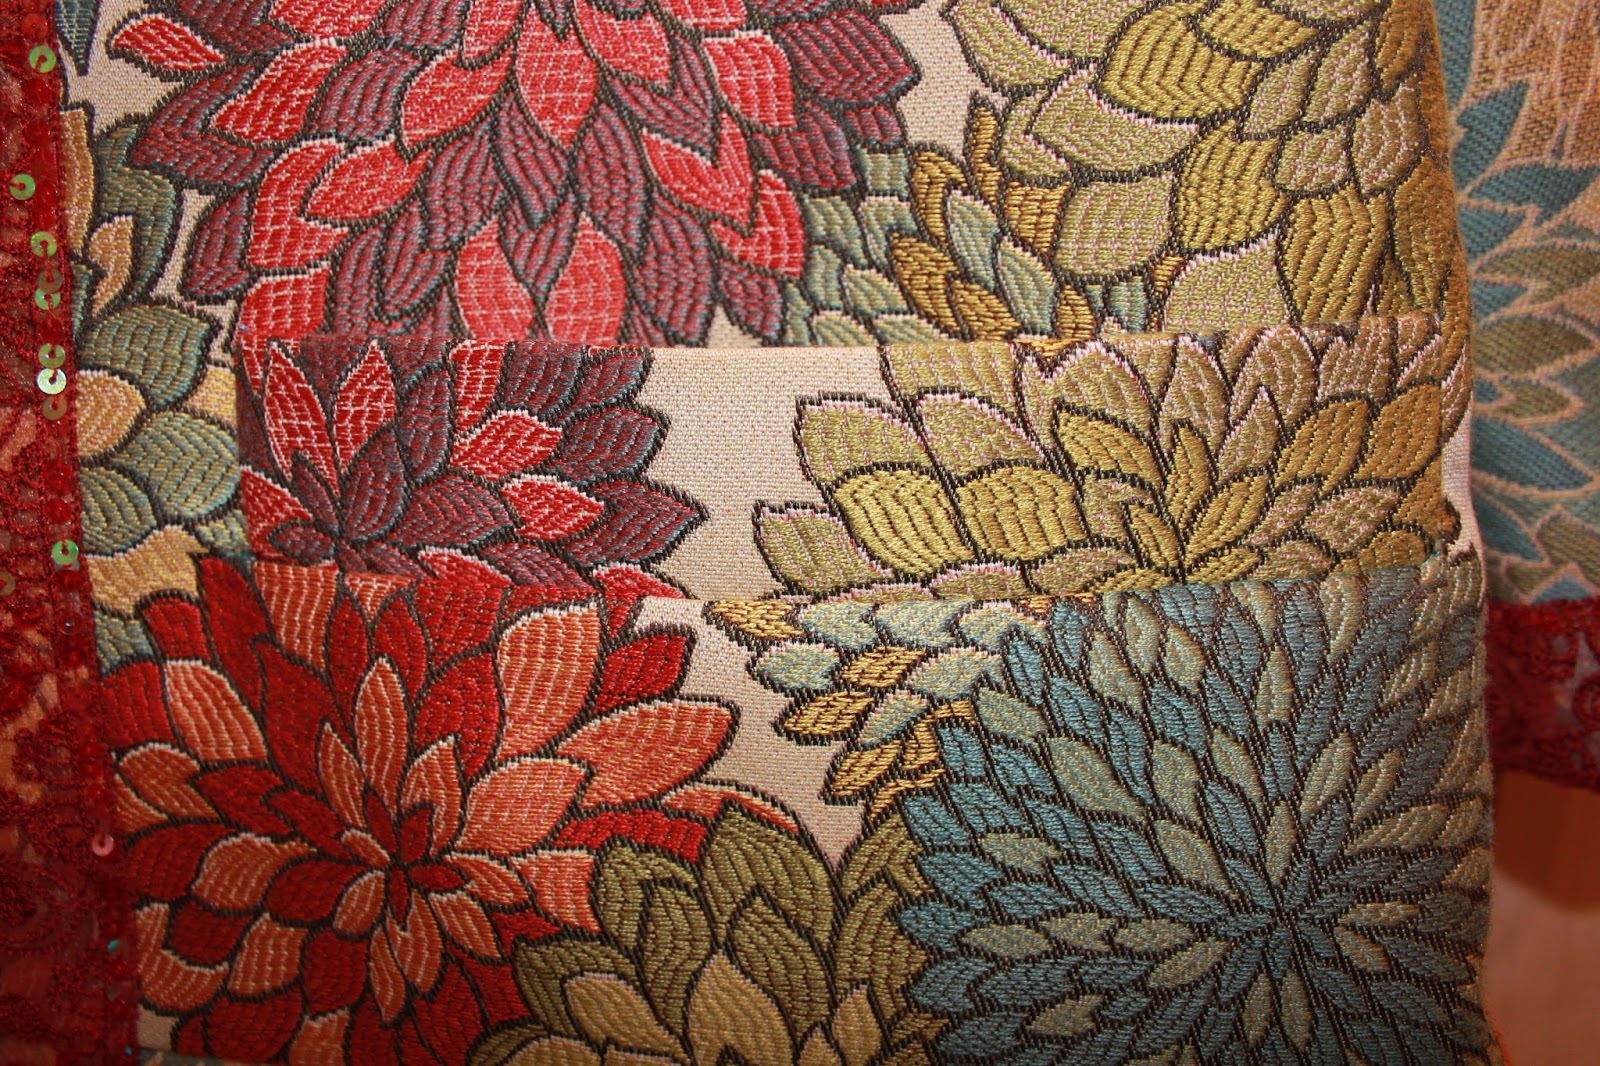
I took my pattern pieces, traced them onto a new piece of paper, and then started dividing them up into squares to create the patchwork pattern. In the end I ended up with a 4 x 1 block down each front, and a 4 x 3 block across the back, then divided the sleeve into three equal pieces. I allocated a material type to each piece using trial and error, trying to get an even spread of the three different fabrics.
For the front I cut the pattern along the seam lines and retraced the pattern pieces adding seam allowances where necessary. I then used these new pattern pieces to cut out my fabric and sewed the three pieces together to make each front section.
For the back I cut blocks of the fabrics to the height required and an even width, then patchworked the pieces together. I then laid the pattern over the new piece of fabric I created and cut it out.
The sleeves were done in a similar manner with the fabric cut into blocks of the right height, patchworked together, then cut to the pattern.
Once I had all the main pieces cut out the coat itself came together very easily however, as the material was quite heavy each seam needed to be pounded with a hammer and ironed with a very heavy hand after being sewed, the coat ended up taking quite a bit longer than I had expected.
The only issue that arose during the construction of the coat was that I was planning on putting the pockets into one of the seams across the front of the coat, however due to the size of the patchwork this would have meant the pocket was either too low down or too high up. So in the end I decided that I would have to do welt pockets.
Now I have never done a welt pocket before so I was a bit intimidated, but I figured at least if I ruined it I could easily take out that piece of patchwork and replace it. Still, I did do a trial on a piece of scrap fabric first before cutting into the real coat. I went back to the trusty internet and looked up a tutorial for welt pockets and found one that I was able to follow along easily. Good old craftsy to the rescue. In the end my first pocket turned out pretty good, and my second one worked fantastically. I was pretty impressed with my first welt pockets.
 |
| Can you even see it - it blends right in! |

The collar (and undercollar) were cut from one of the main coat materials. I was planning on adding interfacing to one of the collar pieces but in my hurry to get the coat complete I forgot, so there is no interfacing at all used in the coat. Thankfully the fabric itself is stiff enough that I don't think it's a huge problem.

One thing that Kathy was worried about was whether or not she would need shoulder pads in this coat. When we tried on the muslin I could see that she did have very sloped shoulders so once I sewed in the sleeves I decided to add some additional padding. I was doing some internet research on sleeve heads, trying to decide whether I needed one in this coat or not when I came upon Gertie's blog post about sleeve heads. The way she had inserted hers, like chest support, actually seemed to be what I wanted so I played around with doing something similar. I first tried sewing two layers of my coat fabric together and shaping around the arm hole, but that got a bit bulky, so in the end I ended up using a couple of scraps of fleece that I had lying around and pretty much copying Gertie's method.
I didn't get any photos of this from the inside but I think it looks pretty good from the outside, fits nicely across the chest and shoulders.

Next step was to tackle the lining. I found a beautiful grey/blue shimmery crepe like fabric that matched beautifully. The back and sleeves were cut using the same pattern pieces as the coat. For the front sections I retraced the original pattern, adding in my fitting adjustments and then I cut it in a straight line about 4 inches from the front edge and added seam allowances to both pieces. The front half of this piece was used to cut the facing out of one of my main materials and the rest was the front lining.
One of Kathy's requests for this coat was to have an inside zippered pocket where she could store her wallet, so the next step was to insert a pocket into the lining. After my success with my welt pockets I think I got a little cocky and did this one without the benefit of a tutorial. It didn't work quite so well...still it's not terrible so I decided to accept it and move on.


The final step was to attach the lining to the coat. It took some fiddling around get the bottom seam to sit nicely, especially around those side slits, but after much playing it was done.

And onto the hand sewing. I was able to find this beautiful sequined red lace in just the colour I wanted and I hand sewed it onto the coat up one front edge, around the collar and back down the other front edge. Another piece was sewed around each cuff.
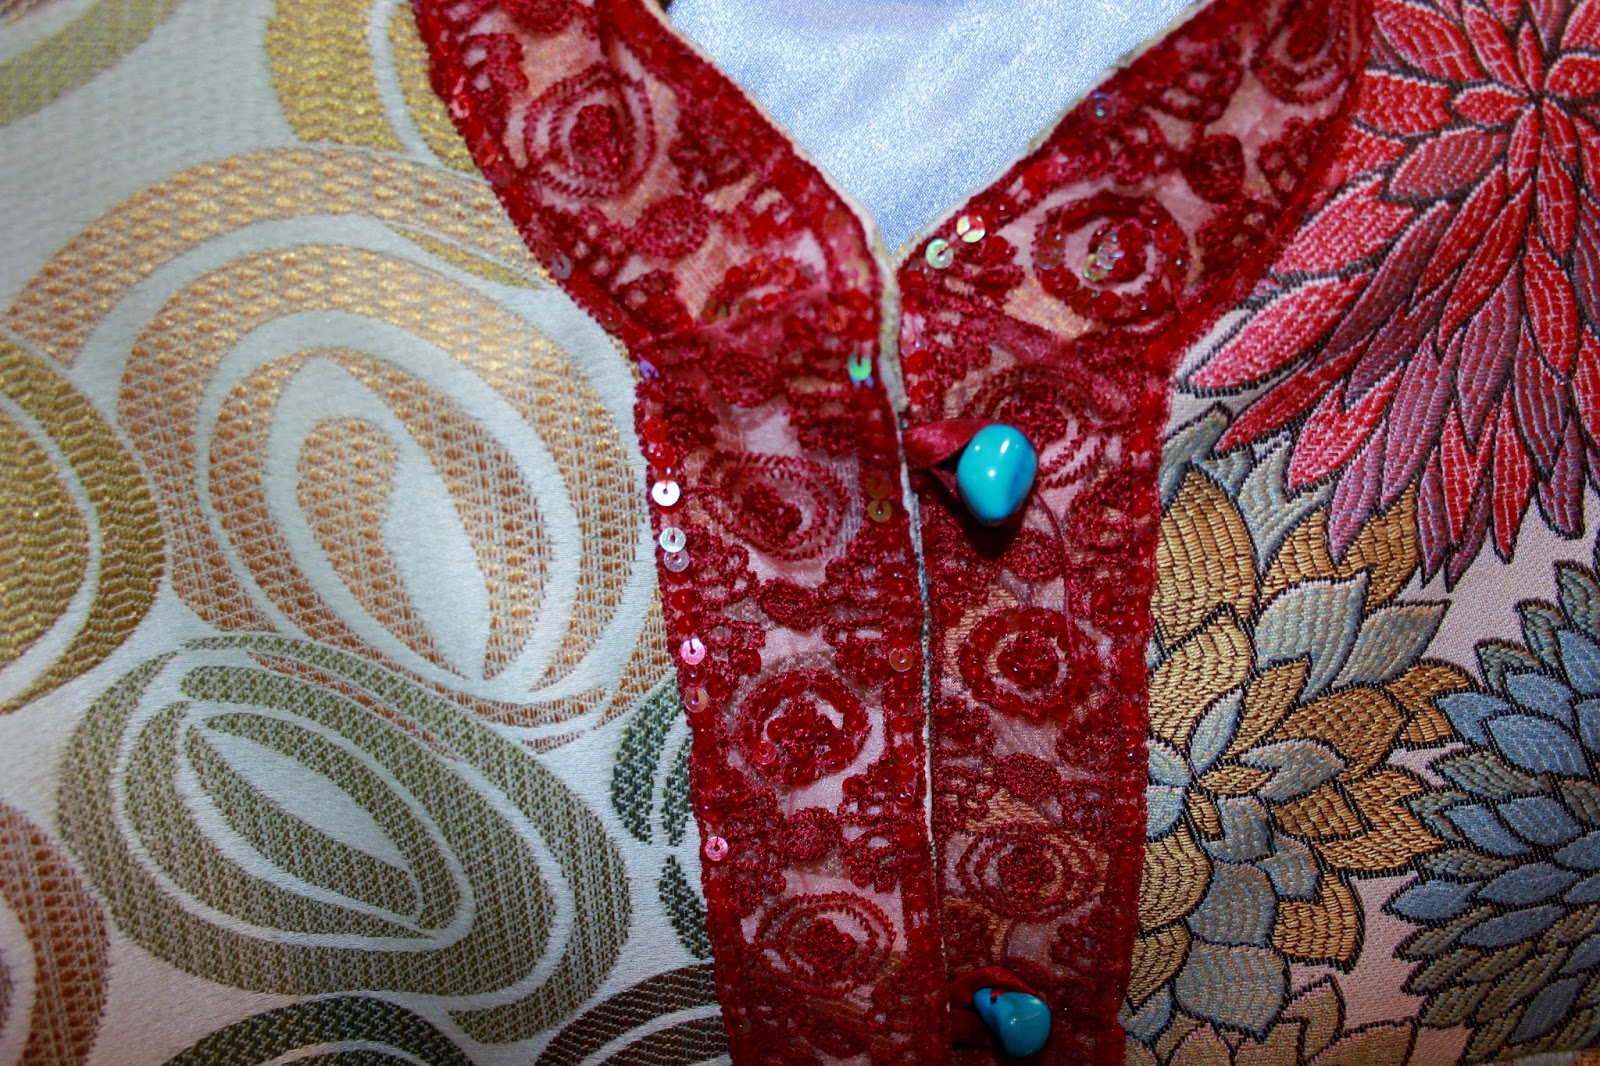
The buttons are actually turquoise beads and the button loops, in a red material to match the lace, were sewed in between the coat and the front facing.
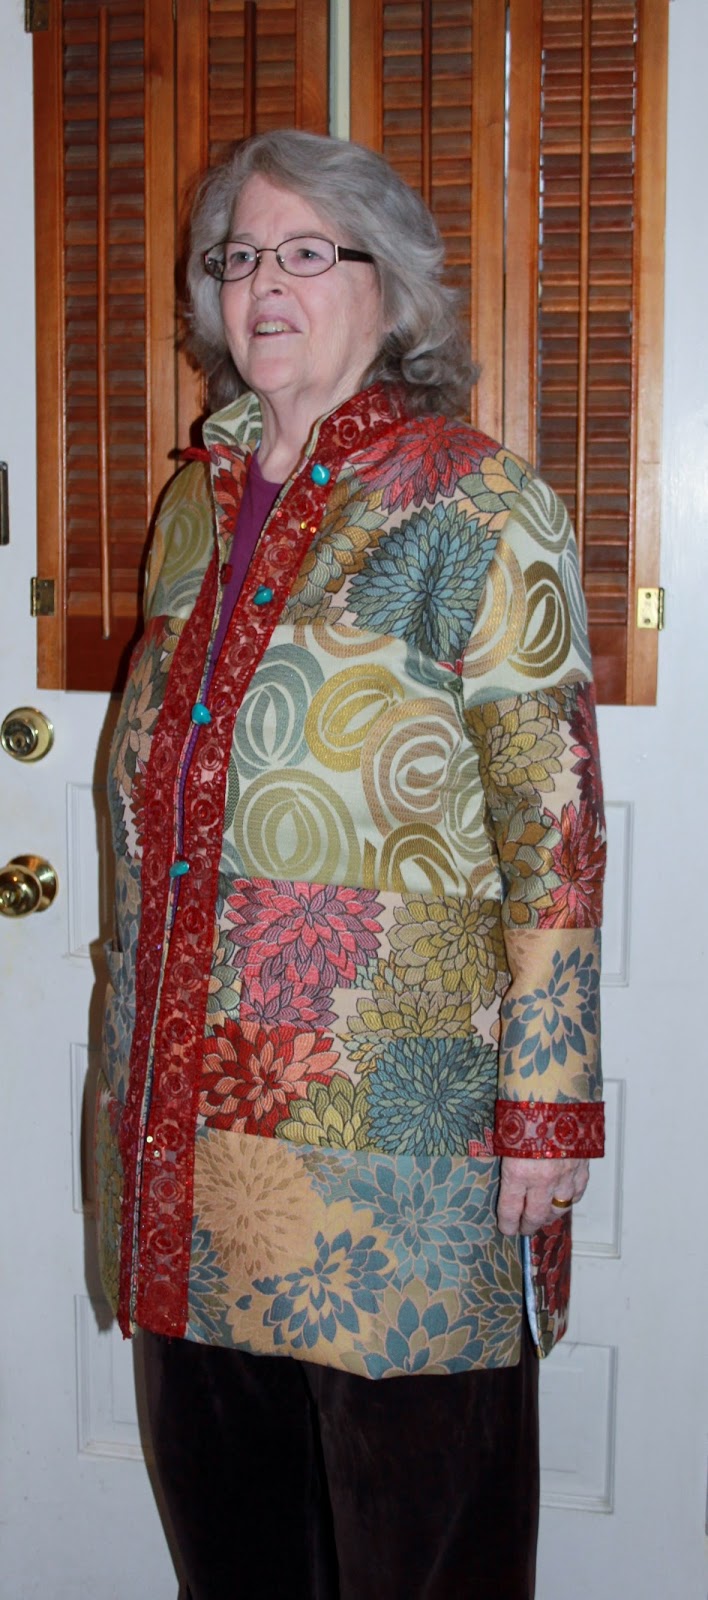


And just a few photos of me modelling the coat before handing it over, it was a bit big on me.