

(beware this post is very long- it goes through my entire making process step by step - if you're not interested in the process feel free to skip to the end for more photos of the finished product.)
First order of business was to create a pattern for the shoes - yes yes I know I have a million and one shoe patterns already, but none of them are quite there yet. I really loved my purple and turquoise corduroy shoes I made and decided I wanted to try and improve this pattern.
The first thing I wanted to do was simplify the pattern. The original shoes had 7 pattern pieces, a toe, tongue, inner side, outer side, heel and heel stiffener and sole. I figured that I could simplify this somewhat by combining the inner and outer sides with the heel piece and combining the toe section with the tongue.
To create the new side sections I retraced each side section minus the side seam allwance and added half of the heel section to the end, adding a new seam at the heel. I then shortened these side pieces a bit as the original shoes were a bit too big.
I then went back to the toe and shortened the point on the toe - I've noticed I do trip over the point on the corduroy shoes occasionally. I also incorporated the tongue into the toe piece bringing the front piece right up to the top of my foot.
These were pretty much all the changes I made.
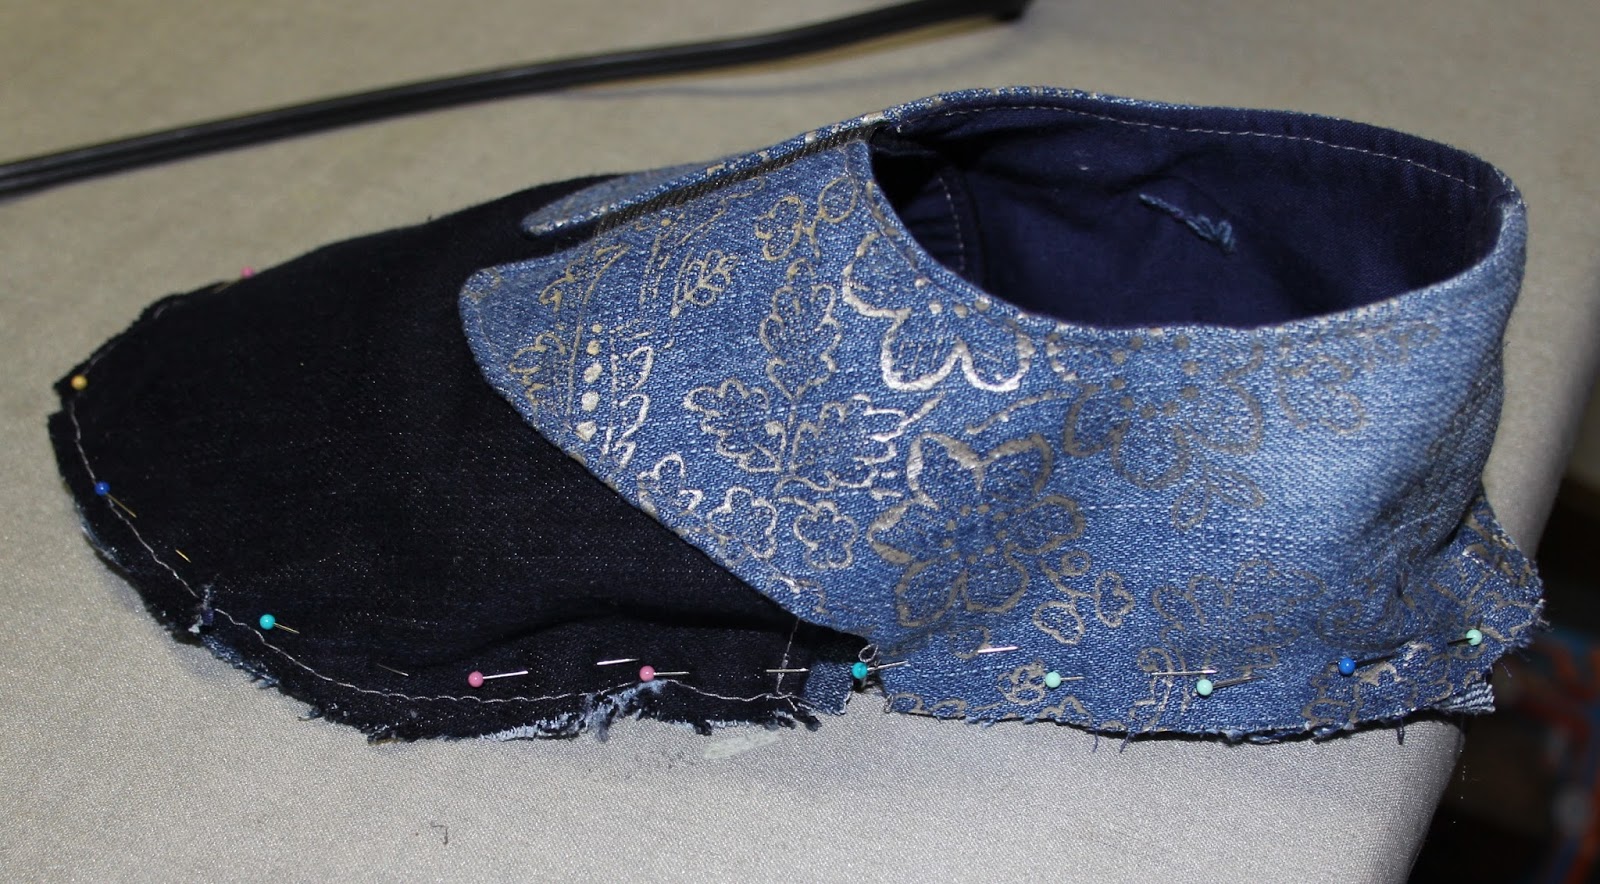
I cut the toe and side pieces out of a navy cotton fabric as a lining for the shoe and then pulled out my denim pieces. I had just enough of the dark denim to do the toe and the heel stiffener. and the two side pieces fitted onto the remaining sections of my embossed jeans.

I then needed stiffening material for the toe and heel - once again I turned to the yoghurt containers - its a good thing we eat a lot of yoghurt in this house.


The first step was to sew the lining to the inner and outer side pieces along the top edge and the front edge.

In the corduroy shoes I did not join the two side pieces together at center frontand then needed to add a closure at the end. This time I decided I would use 2" wide elastic between the two side pieces to provide a little give when getting the shoes on and off, but be snug enough to stay on my foot.
The elastic was sewn into one side of the shoe and that piece was turned inside right.

That first piece was then inserted inside the other piece so that it could be sewn into that side as well.

and we have the sides finished.

The lining was then sewn onto the toe piece and turned inside right and topstitched.

To hold the toe stiffener in place another small piece of lining material was cut and sewn into place between the toe and lining piece.


The sides were then top stitched in place on top of the toe.


And the seam up the back of the heel was sewed together.

I top stitched around the ankle area to finish the ankle of the shoe.


The final piece of the upper is the heel stiffener. The denim piece was sewed to a lining piece around the top curved edge, the stiffener was then placed inside and basted closed.

This piece was then top stitched in place at the heel of the upper.

This upper section was then basted onto the sole piece.


Next up was the inner sole. I used a commercial innersole insert for this, cut to the correct size and shape. I then backed this with a piece of cardboard for just a little added stiffness.


The upper section was hand sewn into place around the inner sole gathering the extra fabric as necessary.

Now all that was left was to glue on the outer sole. The outer sole was cut out of a piece of black rubber base board that I picked up at the local hardware store.

I used contact adhesive to glue the two pieces together. A coating of the glue was applied to the underside of the uppers and allowed to dry. The next day I applied glue to the underside of the upper again and to the rubber sole, allowed it to dry for 5 minutes before attaching the two pieces together.

Pegs were used to hold everything together till it was dry.

And now for the final product.


I love these shoes so far. I haven't had a chance to wear them out yet, but around the house they're beautifully comfortable.
It seems fitting that you are entering some shoes since that is a really amazing thing that you are good at making. Did you see Joost's shoes in the blogger series on Makery? He used a different process which was also interesting.
ReplyDeletefantastic, definitely going to try this. the yogurt carton inserts are a great idea
ReplyDelete