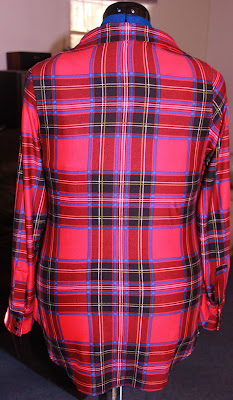
When I first bought home this fabric I had a vague plan to make a button up shirt from it - like a plaid flannel shirt, but in a super soft knit fabric. The thing is - I didn't want it to be too much like a flannel shirt - the boxy look is just not one that works on me, so I knew that I would need to make this a more fitted shirt.
However, when I've used plaid materials in the past, I've found it hard to get a good fit without ruining the lines of the plaid. Under bust darts and princess seams , which are what I usually use, don't look great, so what could I use instead.
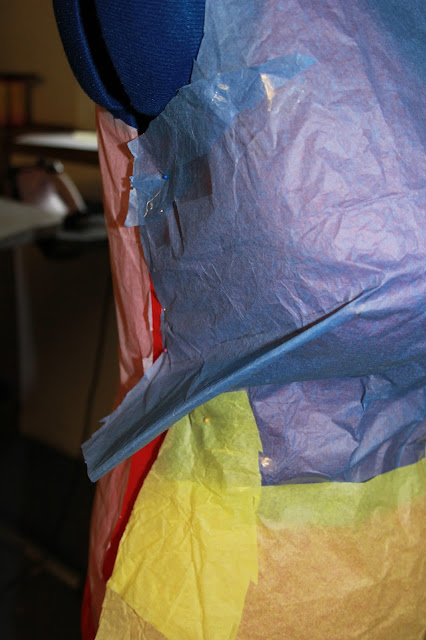
So I started playing around with my new dress form, using tissue paper to create a dart that doesn't interfere with the plaid lines. In other words a dart from the side seam.
I created a paper pattern out of my tissue paper and cut it out of the plaid material.
Not the greatest fit - so I took the darts out, turned it inside out and re positioned the darts directly onto the material, lining up the dart up with the direction of the plaid stripe and the fit ended up a lot better.
So the next step was to create sleeves. I cut out a set of sleeves to one of my basic sleeve patterns and basted it in, the sleeves did not fit (I've since realised that Mummy2 (as my kids have named my dress form) has wider shoulders than I do), the sleeve seam was hanging way off my actual shoulder line. And for some reason the whole thing when I tried it on, just wasn't great. I wasn't sure what I wanted to do with the neckline, but it wasn't working as is. I got a bit fed up with it at this point and gave it a time out whilst I went on and made myself a bra out of the material.
When I was ready to take another look at this project, I decided to ignore the sleeves and start with the neckline, so I grabbed my copy of New Look 6704 and cut out a collar and collar stand. I had to make a trip to the store to get some more interfacing having used up my entire stash on the blanket I made (yet to be blogged), but the next day I basted on the collar and stand and liked how it looked. Next question, do I just make a partial band down the front cut out of the shirt, or do I extend the band the entire length of the front. I cut the button bands full length, and after pinning them in place decided that I actually like the look of the full button band best so I took the scissors to the shirt and sliced it up the middle so I could attach the front button bands.
At this point I was quite happy with how the shirt was going, so I took it all apart and sewed it together properly (minus the sleeves), finishing all seams on the serger. The collar and button band were inserted as per the New look pattern instructions.
In order to fix the sleeve issue, I cut the front and back shoulder back to my actual shoulder line, and removed a lot of the sleeve head, especially around the front arm scythe to make the sleeve sit better. I also used the pattern for a sleeve cuff that I created for my Colette Rue dress to put a placket and cuff on the bottom of the sleeve. Silly me however didn't interface any of the cuff pieces so it ended up a bit wonky - still it's not bad.
And last but not least was buttons. I knew I didn't want actual buttons, but I originally planned to put snaps on instead, but after sitting around in this shirt for a while whist I was working on the sleeves etc I realised just how much it gaped down the front so - since I knew I would never use the snaps anyway I decided to just sew the two button bands together. I inserted a few snaps down the front just for decoration, but they don't actually attach to anything.
I'm really quite please with how this turned out. It's not my normal style, but its comfortable enough that I think that I will wear it (I already have a couple of times in fact). It somehow ended up a smidge tighter around the waist than I had planned (probably due to putting the button band down the front) and I think that the bust darts are a little too high, but for a first draft of a pattern I'm quite happy.
Now maybe one day I'll get around to making an actual plaid flannel shirt - its been years since I owned one of those - and they were mostly worn tied around my waist,,,,,


great work, beautifully shaped. love the plaid, it looks great on you
ReplyDeleteThanks - I'm really happy with the finished product.
DeleteWhat an interesting process! It turned out great!
ReplyDeleteThanks - it was a bit of a roundabout process, but we got there in the end.
Delete