Friday, October 14, 2016

Grey Plaid fleecy cowl dress

Wow there's a description for you.  How many words can you use to describe one dress.


This piece of fabric has been sitting in my stash since last winter.  I picked it up on a whim one shopping trip because it was just sooooo snuggly.  It's not your standard fleece, but something much softer and just so snuggly - microfibre fleece?  Its basically pajama fabric, but I didn't want to waste this on pajamas, I wanted to try and use it in some way that it could be worn out of the house.

At the time of purchase I didn't know what I was going to so with it, then yesterday inspiration hit.  I wanted to make one of those cosy looking fall dresses that I see around so often - you know the type you would wear with leggings and long boots.  Can you just imagine getting up on a cold fall morning and throwing on this pajama worthy dress and being all snuggly and warm.  Well I can now because that's exactly what I did this morning.

So I had a picture in my head of what I wanted - I was thinking simple knit dress with long sleeves and a cowl neck, and miracle of miracles, going through my pattern stash, I found the perfect pattern. Simplicity 1716.


This is one of the patterns that I picked up at a garage sale last winter at $3 for a box of patterns.

So the only problem - as usual - was what size to cut.  I decided to make it easy on myself and cut the entire thing out at the maximum size 20 and then took it in from there.  I sewed most of the seams with about a 1" seam allowance, the back fit pretty well doing that but I had to make a number of adjustments to the cowl at the front, cutting it down to a size 12/14 across the shoulders.  The sides seams had to be taken in quite a bit.    Once I had the fit to what I wanted I trimmed all the seam allowances off to 3/8 inch and then took the entire thing apart (I'd just sewn it with basting stitches). I compared the newly cut pieces with the pattern and found that the sleeves were down to about a 12, the shoulders to a 12/14, the arm scythes around a 12 as well, and the side seams graded from a 12 under the arm to the original 20 at the hem.  I'd be tempted to cut the entire thing at a 12 if I were to make it again - although only with another fabric that has as much stretch as this one.


After making sure everything was still symmetrical (requiring a little more re-trimming) I sewed the entire then together properly.  I didn't bother with any seam finishing on the inside as this material doesn't fray at all.  I did however use that plastic elastic tape stuff (is that the technical name for it) around the back neckline to ensure that it doesn't stretch out of shape with the weight of the cowl.


I did pretty well matching the plaids horizontally, though there are a few issues with the vertical matching especially down center back.  Still who's going to care except me.

My one and only issue with this dress is that it has a tendency to slip backwards off my shoulders.  I'm not entirely sure what I can do about that - I was hoping that the stay tape at the back neckline would take care of it, but it didn't.

I'm not sure if I'm going to keep this dress as is, or if I need to re-cut the front some how - I've found that when I wear it I find myself re adjusting it time and time again which I really hate....but it's just so snuggly and warm I can't help wearing it anyway.


Wednesday, October 12, 2016

Pattern Review Sewing Bee Round 3 - Colette Rue

Well the good news is that I got through to round 3 of the Sewing Bee.

The challenge for round 3 was to make a garment using the pattern provided.  The pattern that they provided was Collette's Rue dress. 


I have to say that when I first saw this dress I wasn't overly thrilled - its really not my usual style - apart from the fact that I very rarely wear nice dresses I wasn't sure how easy it would be to fit that bodice,  But I decided to embrace the challenge.  I have been wanting to sew a winter going out dress for a while that I could wear to birthday dinners etc so decided that I would use this as the dress.

The day that I found out what the challenge was was also the day of the Pattern Review Boston area Meet-up.  This was being held at Pin Tuck & Purl a fabric and wool store in Exeter NH which is a good 2 hour drive away, so I wasn't sure if I was going to go.  I decided that it might be a good idea to go and check out their fabric selection as I knew I had nothing in my stash that would work, and I'm glad I did.  I spent the drive up thinking about what I wanted to do with this pattern and I had decided that I wanted to use two contrasting fabrics to really show off the design lines in the bodice.  Browsing around the store I found two fantastic fabrics from Cotton + Steel.  The first was a aqua blue cotton fabric with metallic sliver sardines embossed on it. 


 And the second was a linen cotton fabric in a neutral beige colour with styalised maps of the big cities of the world on it.  The colour in the maps matched the aqua colour of the sardine fabric so they went together beautifully.


With my fabrics in hand and a plan of attack mapped out in my mind I went home that night and downloaded my PDF pattern and printed out all the pages and taped them together.  I decided to go with version 1 of the pattern with the pleated skirt and longer sleeves.

According to the pattern, my measurements  fall between size 10-12 for bust,  at size 14 for waist and between 10 and 12 for hips. I decided to cut a straight size 14 to start and then trim down as required.


I used an old sheet to cut out a muslin for the 3 bodice pieces - back, lower front and upper front.  I sewed it up to the straight size 14 and found that it fit almost perfectly in length with my bust point sitting right where it is meant to according to the sew along. The fit at the waist was good, but there was a lot of excess fabric everywhere else. to reduce this I:

  • Took 1/2" out of the center back seam, this brought in the neckline at the back as well as removing some of the excess fabric across my back. 
  • Extended the back dart right up into the neckline tapering from the specified dart legs at the bottom of the bodice down to 1/4" at the neckline.
  • On the front, I pinched out darts from either side of the neckline to the bust point to remove excess fabric and bring the shoulders in.
  • Pinched out a dart in the middle of the arm scyth, also tapering to the bust point. 
  • Pinched out about 3/4" of the lower bust piece along the front curve to get the material to curve under my breasts. 
  • Moved the shoulder seam back by about 5/8" and tapered it slightly so that it sat on the top of my shoulder.
I then trimmed all my seams back to 5/8" and took the pattern pieces apart, leaving all the additional darts intact and modified my pattern pieces to account for these changes.

I was then able to start my second muslin.


For this I re-cut my bodice from the old sheet again, using my new pattern pieces, plus also cut the sleeves and skirt to test those. Again I started with a size 14 for each of these.

I had no problems with the skirt and made no changes for fit apart from removing 5" at the lengthen shorten line so that the skirt came up to just below knee length. 

With regards to the sleeve, I:

  • Lowered the entire arm scythe by about 3/4" 
  • Scooped out the front curve of the arm scythe by at least 5/8". 
  • Scooped out a corresponding amount of the front sleeve head.
  • Measured the new length of the arm holes and compared it to the length of the sleeve head curve and decided to go with a size 12 at the front of the sleeve and a size 10 at the back. I then tapered the sleeve to get a closer fit ending in a size 8 at the cuff. 
  • Extended the length of the sleeve by 5" to make it a full length sleeve.
Once I was happy with the fit of the dress I turned to design. I went back to the fabric store and bought two cheap fabrics in similar colours and weights to my planned final fabrics and sewed together the bodice using these fabrics.  The back and upper front in a blue cotton fabric and the lower front in a neutral canvas material.  For the skirt I wanted the blue fabric for the majority of the skirt and the back of each pleat to be lined in the canvas fabric.  


In order to do this I had to modify the skirt pattern pieces. Each skirt pattern piece was split into 2 to remove the section of skirt that would normally be the back of the pleat. I then added a seam allowance back onto these edges. Separate pattern pieces were created for the back of the pleat consisting of the section of the original pattern plus seam allowance either side.

I cut and sewed the skirt using the two trial fabrics as well as the sewing in the sleeves in the main blue fabric.

I decided that the dress needed some more embellishment and played around with a number of different options for changing up the sleeve before settling on the sleeve cuff and placket idea so I drafted those pattern pieces and modified my sleeves accordingly. I still wasn't happy with it and after much deliberation I decided on adding the stripe down the sleeve. I modified my sleeve pattern pieces accordingly and then took one sleeve apart entirely and remade it to test the design.


Once I had this third muslin finished, I decided that I didn't like the placement of the fabrics on the bodice and that I wanted to swap the fabrics around. I originally had the blue cotton on the top of the bodice and the neutral canvas on the bottom of the bodice. In order to test the idea of swapping the materials I took a photo of myself wearing the muslin then took close up pictures of my two fabrics, after printing these photos I cut the fabric photos up and played dress up doll with the picture of the muslin. When I was happy with the new material placements I went ahead and laid out and cut my final pattern pieces. 

I sewed together the shell of my dress in my main fabric following the instructions in the pattern with the addition of a few extra seams to insert the pleat material into the skirt pieces. 

I made a number of other small adjustments as I was making my final dress, trying on the dress and then tapering a seam by 1/8" here or there just to perfect the fit for my body.


This dress is designed to be fully lined.  I decided that if I was going to line the dress I may as well make it reversible.  I found a super soft cotton lawn material with a pink/teal paisley/leopard print and cut out and sewed an second version of the dress (including pockets).  


I followed the pattern instructions for putting the shell and lining together and inserting the invizible zip.

When it came to the sleeves I laid the shell sleeve (consisting of the two blue pieces with the strip of map fabric down the center) and the lining sleeve on top of each other wrong sides together and treated it as a single piece whilst putting in the sleeve placket. I then sewed the outer sleeve together as normal and the lining together, and turned them inside right as one unit and sewed on the cuff. 


I'm super impressed with how these cuffs came out - I really took my time and made sure they were perfectly lined up both inside and out.


Finally I sewed the sleeves into the dress using the instructions in the pattern for the lined sleeve.


The hem of both the shell and lining were finished with a rolled hem on the serger and then the outer fabric was turned under an additional 1/8" to create a clean finish on the bottom of the skirt without any extra weight.


Pockets were included in both layers of the dress - you have to love a dress with good pockets.  I do find that these pockets are set back a little bit too far, but still....pockets!


There was a lot of contention about the drafting of this pattern, but personally I didn't find it that bad - I must have a shape close to the one that this pattern was drafted for.  Whist I don't love the darts over the bust I didn't find the curved shape under the bust as hard to fit as I expected.


Once the dress was finished I was in love - I love the way this dress fits - I love both the outer and inner fabrics I love everything about this.....unfortunately it did not get me through to the next round of the competition,  but I do have my consolation prize - a fantastic new dress!


Tuesday, October 11, 2016

Pattern Review Sewing Bee Round 2 - A Bias Cut Coat


So I talked here about entering the Pattern Review Sewing Bee.   As I said at the end of that post I did in fact get through to round 2 of this competition.  The challenge for Round 2 was to make a garment cut on the bias (a 45deg angle). 


 As with most other people (or those who sew anyway)  when I hear bias cut I automatically think about a slinky dress that clings to all your curves or of stripes/plaids cut on an angle to make cool patterns.  Of course I did not want to do the obvious for a competition so I started thinking about what else I could do.  The first two things I thought of were either a pair of pants, or a coat.  I took myself to the computer and started looking for inspiration.  One of the first things I found was this sewing pattern.


I really liked the look of this so I decided that I would try and make something similar.  An A line swing coat.  

Then I had to figure out what material to use.  I went down to my fabric stash and started searching through and found a piece of material that I had almost forgotten about.  Its an upholstery fabric that I picked  up quite a while ago at our local discount fabric place. I'm not entirely sure about the fiber content, but a burn test showed that it is probably a cotton velvet and polyester/cotton Jaquard type fabric.  I bought 2 yards or it thinking that it would make a nice coat, but then could never figure out what sort of pattern it would work for so it's sat in my stash ever since.

I then needed to create a pattern for this coat.  I knew that I wanted the entire thing to be one piece that just wrapped all the way around.  I figured that the most important thing would be to get the shoulders to fit.  A while ago I made a coat for a friend using a similar weight fabric from Butterick pattern 5944 - I knew that the shoulders of this would fit me so I used this as a starting point.

I used the back pattern piece to trace the back neckline and armholes at size 14 onto a sheet of paper (I was on limited time and had no large paper on hand so ended up using a roll of christmas wrapping paper to create my pattern - economical and festive). I then used the front pattern piece to continuously trace the front armhole and front neckline on either side of the back. I then cut under the arm and spread the pieces out to the point where the tops of the armholes just touched to create the A line shape of the coat. I now had two fronts and one back. To create the asymmetrical front I cut one front piece off at an angle from the front shoulder across the body. The other side was cut at a similar angle starting from the center front point. 

To test the pattern I originally cut it out of an old sheet, but I  found that the sheet had a lot more drape than the fabric I wanted to use, so turned to an old blue and white checked vinyl table cloth to make a second muslin - its amazing what you can come up with when you're under the gun. 

My muslin showed that the armholes and sleeves were too tight whilst the shoulders were much too wide. I lowered the bottom of the armhole by about 3/4 inch and also took about 3/4 inch off the outside width of the shoulder. I also lowered the back and front necklines by around 3/8". The sleeves from this pattern were way too tight around the upper arm. I decided that I wanted a two piece sleeve to get a good fit and shape so used my sleeve pattern from Simplicity 1732. However this has a very puffed sleeve head so I used the sleeve head shape from the original sleeve pattern and combined the two patterns into one.

Once I was happy with the base pattern I added a rolled mandarin collar also based on the Butterick pattern 5944.  

My main pattern piece was laid on my fabric with the true bias running down the center back line of the pattern. The sleeve and collar pieces were also cut on the true bias.


Once this was done, the actual sewing of the garment was quite easy.  The two shoulder seams, the two seams on the arms and then set the sleeve into the coat and it was done.  


However I wanted to make sure the coat was useful for our cold New England winters, so I decided to line the entire coat. To create the lining I used the same pattern pieces to cut a bring purple satin and a layer of warm and natural batting.  I then quilted these two layers together in a diamond pattern.  The lining was sewed together in the same way at the main garment and then it was attached to the coat at the neckline (with the collar piece sandwiched between the two layers) and along the front edges.


I then had to decided how to finish off my coat.  I remembered an old skirt that I made years ago in my teens. I had splurged and bought real velvet and made it up into a skirt. I then accidentally threw it into the wash and the velvet became all splotchy. Still I refused the throw it out and its sat in my fabric stash ever since. I pulled out the old skirt and it was actually a really good colour match - I decided that the blotchyness would not be noticeable in bias binding form so I cut myself a 200" strip of velvet bias binding.  I used the binding to finish off the angled front edge of the coat, and then used it to finish the sleeves and the hem as well.


All good winter coats need a big pocket as I tend not to carry a purse in winter but throw everything in my coat pockets.  As there were no seams to put a pocket in this coat I decided to add a welt pocket  I used some of my red velvet fabric to create the welt, and positioned it so that it was at 90deg to the pattern on the front of the coat.


Then I just had to figure out how to keep the coat closed.  I had originally planned to make it a button closure, but then I realised that a zipper would be a lot easier, so I sewed a black separating zipper  at and angle just under the front  edge of the coat.


I did add two fake silver button to the top edge as decoration.


I love the way this coat turned out and can't wait till it's cold enough to actually wear it.


Monday, October 10, 2016

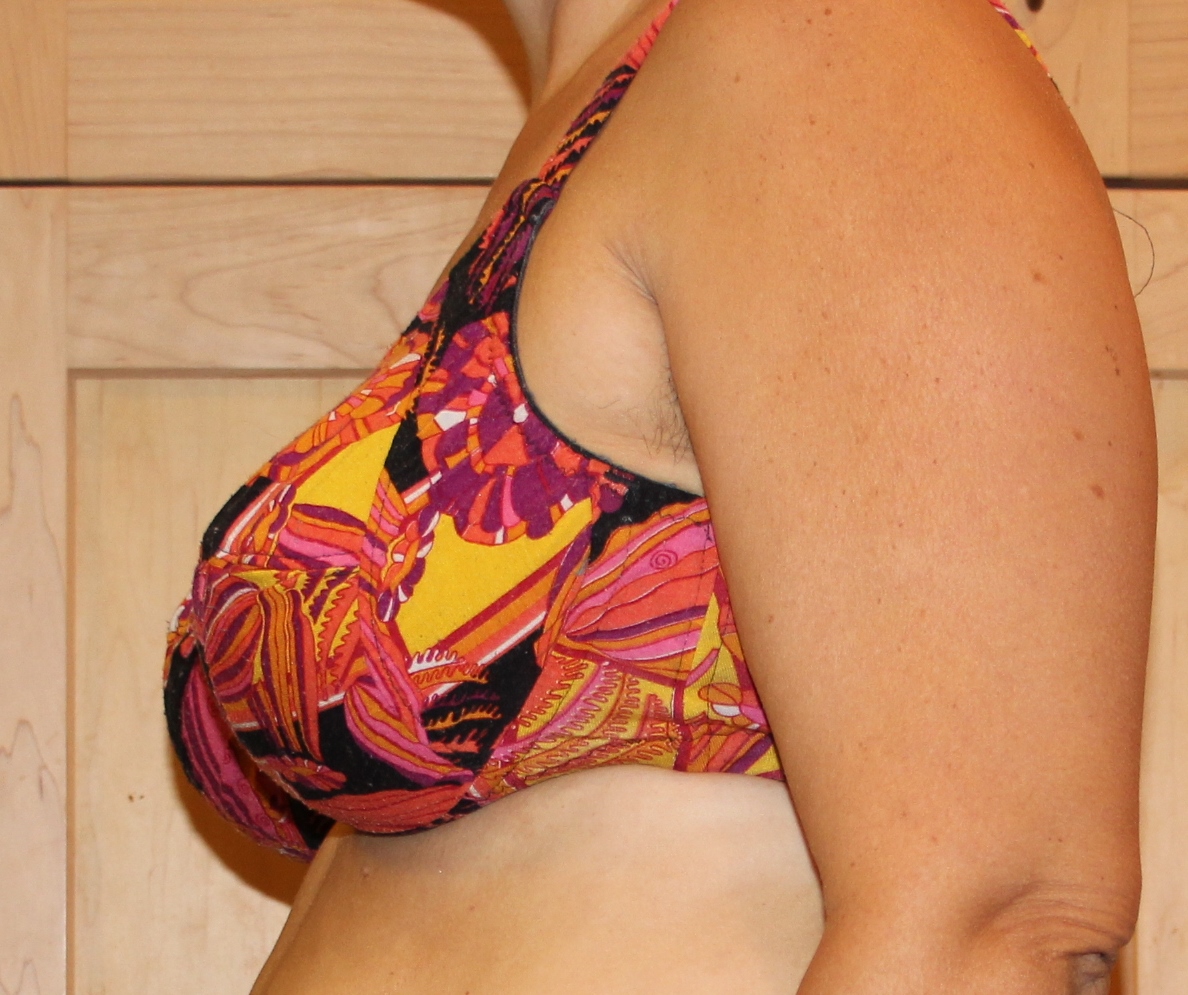
Two More Bras- Pink and Orange Paisley and Teal Lace

For the last couple of months, I've been steadily working on perfecting a bra pattern.  I started with the Bravo Bella  Bravo Bra #2 pattern -  My first attempts were blogged here.  Whilst I could see that the pattern had some merit I certainly wasn't totally happy with it so I went back and had a second attempt playing around with the cup sizing and making sure I followed the pattern a bit more closely this time.

Bra #3

Bra #4

For Bra #3 I used the 36G Cup pieces and the 36 for the bridge, but kept the 38 for the back band.    I used my nylon tricot for the inner cut and power mesh for the inner band and used a pink/orange/black paisly knit fabric for the outside.


This turned out much better, but it still had a few fitting issues.  Mainly there was just a bit too much fullness in the top of the cup.  


I again used 5/8" elastic for the bottom band 3/8" for the top of the band and cups.  This time I also extended the 5/8" elastic on the back end of the straps down and into the band closure.


I used some crepe satin material to make the underwire casings and again the underwires and back closures were taken from a $3 bra I bought at Walmart for that purpose. I had a few issues with the underwires poking through the casing but went back and covered the ends of the underwire casings with gross grain ribbon where necessary and they seem to be holding up OK now.

At this point I was pretty happy with the pattern so decided to break into the lace fabric that I bought a couple of months ago for this purpose.  Its a teal green with a 2 way stretch.


But first I had to go back and make a few modifications to my pattern based on the previous bra.
First I decided that the seam down the bottom center of the cup was redundant - it doesn't provide any further shaping so I put the two pattern pieces (pattern piece 1 and 2) together and traced them.  In order to remove the fullness at the top of the breast I then cut both the upper and lower cup pieces at the center point and overlapped the pieces, whilst also trimming some length off the bottom of the upper cup piece.


I was originally just going to use the lace as the outer piece and the tricot/powernet as the inner pieces, but realised when I tried to sew it together that that allowed all the ugly edges to show through, so I went back and cut another set of the cup pieces out of the tricot and lined the lace in tricot.


To make the underwire channeling this time I use the nylon tricot, but I folded it over twice so there was 4 layers of the material in the channeling - so far I have not had any issues with the underwire poking through.

Otherwise everything else was the same as the previous bra.

I did make a pair of underpants to match the pink/orange/black bra, and two pairs to match the teal lace bra, however the teal ones didn't turn out great since I forgot to account for the fact that the lace only has two way stretch....still they look pretty at least.


Overall, both these bras are really comfortable and give good support.  I think I'm finally happy with this pattern and will finally invest in some real bra making notions so my next bra can be perfect - hopefully!