Saturday, January 9, 2016

Red paisley dress from scratch

If I do have to say so myself this is probably my most successful "from scratch" project to date.


For a while now I've been trying to make a good sloper pattern, but thus far it has eluded me.  I've attempted two times so far as documented here and here with no real luck.  So this time around I decided I needed a new approach.  I found a different tutorial on the web here.  This one seemed a bit more basic and for the first time I was able to understand exactly what each measurement was for and how to use it which allowed me to create a much better sloper.  I was even able to add in a couple of additional measurements to give it a better fit in those areas where I really deviate from the normal.

So now I have a bodice sloper and a basic sleeve (I still need to do some work on the sleeve sloper that's still not quite right) and needed something to try it out on.  Over the weekend I went through and sorted out my entire fabric stash (and my yarn stash too whilst I was at it).  What I found when I did this was that I have very little in the way of lightweight material.  I have a bunch of cotton scraps, a bunch of knit scraps and everything else is bottom weight or heavier.  I ended up back at the red paisley fabric that I blogged about here.  This is probably the lightest weight fabric of any significant length I have so I figured it was my best bet.

Now - what to make out of it?  I really don't own or wear woven shirts - its knits all the way around here.  I knew I'd never wear a button down type shirt but then I found the Torii Tunic Pattern from Serendipity Studios.


This is something that I would wear.  I originally planned on making something similar in a tunic length, but I cut it longer just in case I needed the extra fabric and ended up liking it the length it was.  Not quite long enough to be worn without leggings, but longer than a standard tunic.


I took the basic sloper and modified the single under bust dart into an under bust dart and an armhole dart.  I cut out the bodice without any contrasting fabric to test the fit of the sloper and sewed it up just using a basting stitch.  It ended up fitting really well, the only issue that I found was that I had forgotten to true the bottom edge of the pattern after changing the darts.  Luckily I decided that for this pattern the bodice needed to be an inch shorter than I had cut it, so I was able to use that extra length to fix the issue.  I also decided my sleeves were too baggy so ran them in a smidge.  Once I was happy with the fit I took the entire thing apart and modified my pattern accordingly.  I decided that I wanted the contrasting neckline so cut the front and back bodice piece into two and added the necessary seam lines.  I then went back to my fabric and re-cut it to the new pattern pieces.


To find a contrasting fabric for the neckline, waist band and bottom I headed back to my stash.  The only thing that I found that matched was a rust red linen material.  It's a much lighter weight than the paisley material so I interfaced it to give it a bit more structure. Unfortunately I only had a very small piece of it, so was only able to get a waistband and the most of the neckband and facing out of it, so the bottom band had to be made from the main paisley material.  For the neck band I ended up having to add a bit of the paisley material right at the very back seam to get it to fit which is not great, but really who's going to notice if I don't point it out.


To make the skirt section I cut two rectangles of the paisley material and sewed them together down the side.  I pinned the side seams to the bodice side seams and then took the extra material on the back of the skirt and made it into a box pleat in center back.  The front was not quite so easy to figure out.  I did not want gathers - gathers around my waistline are NOT a good idea.   I tried just taking out the extra fabric at the seam line and making an A shaped front piece, but it ended up too tight around the belly and I was not happy with it.  In the end I went with two pleats two inches from the seam line to create a nice flat section across the front of my belly.


I was now ready to sew the thing up properly.  This was the first project for me that I got to use my new overlocker that I got for Christmas on.  Every seam was basted together on the sewing machine, serged on the overlocker, then topstitched for a really nice finish inside.  The only exception was the very back seam where the zipper was to go.  Each side of this seam was serged separately  - this material frays very badly so I didn't want any exposed edges.
   

It was during this stage that I had my first....and then my second... accidents with the overlocker.  I knew it would happen sooner or later.  An extra piece of fabric got caught under the overlocker and not just stitched but cut....arggghhhh  a new hole right in the front of the arm.  And of course I didn't have any matching thread to fix it and the black looked terrible.  After playing around with a number of different options for fixing it I just gave up and left it like this.  Again, unless you know where to look a casual observer ins't going to notice it.


I put in a invisible zipper down the back - my first invisible zipper - not my best effort, but for my first, not bad.


The last step was the hem.  I had made the skirt section extra long and I knew I didn't want it full skirt length, in the end all I did was turn the bottom up about 2.5" then , turned it back on itself and serged along the resulting three edges, effectively creating a 2" band around the bottom.


Saturday, January 2, 2016

Lime Green Velour Wrap Pants.

Recently one of my favourite community forums started up an informal sew along, so of course I had to join in.

There were three sewing patterns to choose from.  I chose the wrap pants as they sounded quite interesting, and not something I'd normally try.  It's always nice to step outside your comfort level and try new things

The tutorial that we were to follow was:

https://laupre.wordpress.com/2008/06/29/easy-breezy-wrap-pants-tutorial/

As I limited myself to using stash fabric for this project I didn't have a lot of choice, this pattern uses quite a bit of fabric and most of my stash is in smaller pieces these days.  My original thought was to do them in fleece for a pair of super comfy cosy lounge pants, but once I realised just how much fabric was used I decided that they would probably end up way too bulky.

Then I found some lime green velour that I bought a while ago to make a costume for my daughter..Mmmm lime green velour wrap pants - who wouldn't want a pair of those.


The next problem was I didn't have quite enough fabric.  I needed two pieces of fabric approximately 55" x 41".   I had two pieces of 35" x 41", and managed to squeeze out two pieces of  15" x 36".  Sewn together that gave two pieces of about 50" x 41", with a chunk out of one corner.  Thankfully most of this chunk is obscured by the way the fabric wraps around the legs, so it's not too bad.  You can just see a small section at the back where the fabric is too short.


I cut out the crotch area and sewed the two pieces together around the crotch.  The next step was supposed to be finish off all the edges, but since I'm not planning on wearing these out of the house, and the velour fabric doesn't fray I skipped that step.

To finish off  The tutorial said tI had to put in a waist band. o just fold over the top edge of the fabric and attach the ties at each end, but as my fabric is stretchy I needed some stabilisation around the waist.  To do this I ran the ribbon that I was using for my ties right along the top edge.

Starting with the center of the ribbon at the back of the waistband I turned the fabric over the ribbon  about 1/4 inch and used a zig zag stitich to stitch the fabric to the ribbon.  I then turned the ribbon over again and ran a straight stitch along the top of the fold encasing the ribbon into the waistband.

I didn't want to have to tie both layers of my pants on, and figured that all those bows could end up quite uncomfortable around the waist, so instead for the inner layer I  put a snap on either end of the fabric and cut the ribbon short.


Overall they're a cute pair of lounge around the house pants.  It ended up taking me two evening to sew them, but mainly because I spent some time playing around with other options for the waistband.  In the end I decided to pretty much stick with the tutorial so all that time was wasted anyway.


Would I ever make these again? - you know I just might, they make quite a nice pair of wide legged pants.  In a really lightweight cotton or linen I think these would make a great pair of summer pants for when you want to be covered,  but not hot....

Tuesday, December 29, 2015

Jeans!

Well I have a total of one pair of pants in my wardrobe that actually fit at the moment so it was time for a new pair of jeans.


I found a great piece of fabric last time I was at the discount fabric store.  A really dark denim, heavy weight but with lots of stretch....and at $1.99/yard how could I go wrong.....Well I almost did.  After cutting my fabric out I realised that I hadn't actually washed the fabric first, now I've been caught out before with things shrinking during the first wash, so rather than risk it I went ahead and washed all my cut out pieces, which resulted is some frayed edges, but at least I was sure that they would fit in the end.

I used the pattern that I created for my last pair of Jeans as a starting point.  For this new version I cut them out with an extra 1/2 inch at each side seam.  I lowered the front rise about an inch and the back rise about 1/2 inch.
I started sewing with the two back pockets.  I wanted some pretty top stitching like you find on store bought jeans so I set my normal machine up with purple thread and my "new" old machine (that I was given by one of the ladies at my Thursday knitting group) with silver metallic thread and stitched my design with a combination of the two threads.


I then sewed a backing of random cotton onto the back of the pockets to finish off the inside, before sewing them onto the back of the Jeans.


I did a  full fly install into the front of the jeans which actually tuned out very nicely - except that after a couple of washes some of the top stitching is starting to come out.


I added pockets in the front, again top stitched with a combination of the purple and metallic silver thread.


and lined with a piece of scrap cotton from my stash.


I basted together the side and inner seams and that's when I got stuck.  The pants were so close, but there were definite wrinkles under the butt that no matter what I tried I could not get rid of.


The pants got put to the side a couple of times whilst I tried to figure out how to get them to work....but in the end I decided close enough is good enough and just went ahead.  I ended up letting out the inseam at the back of the crotch and taking it in at the front and that helped somewhat, as did a bit of trimming around the knees....  but some of those butt wrinkles still remain.


I need to add quite a bit of length the the bottom of the crotch curve next time...

I added a yolk to the back as it was riding down a bit as I walked upstairs, and then the waistband.  And for the final fitting I added 1.5" wide elastic to the waistband....yep I like my jeans to come with elasticated waists.....My problem is that my waist is the same size as my hips so my pants are always either falling off, or really digging in around the waist - hence elastic is my friend.

The hems I just ended up turning up the minimum, I think next time I need to add some length to my pattern, these work fine with my soft soled shoes but anything with an actual sole they could be a bit short....good thing I don't do heels!


Overall they're not bad, but they're not fantastic either.  I think I see a pants sloper in my near future,


Thursday, November 19, 2015

A Patchwork Coat

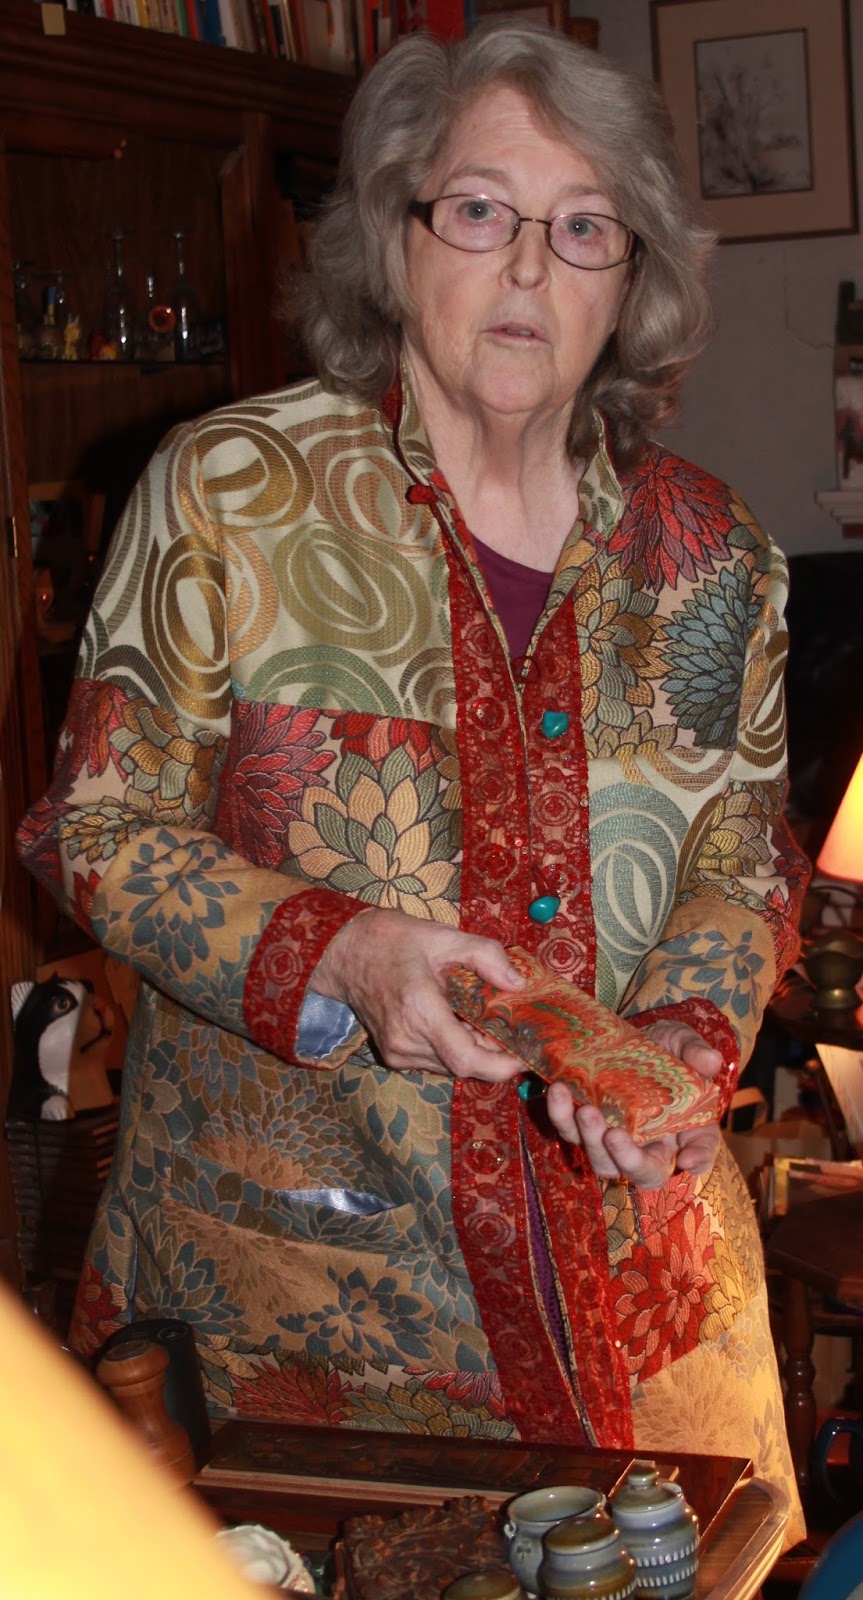
For about 5 years now I've been volunteering down at our local seniors center driving meals on wheels.  After many comments on how much they love my work, last spring one of my clients asked if I would be willing to make a coat for her.  She had a picture from a magazine of a coat that she loved and wanted to know whether I could make her something similar.


Of course I said yes.  A few things got in the way and we had to wait a while before we got started, but finally yesterday I delivered her the finished product.


The first step to creating the garment was finding the right pattern.  I printed out many different options for patterns for her to chose from, but none of them were perfect.  None that is till I raided my mums pattern stash.  In there I found Butterick Pattern 5944.


View B was almost exactly what Kathy and I were looking for, The only modifications I had to make were to add pockets and a lining.

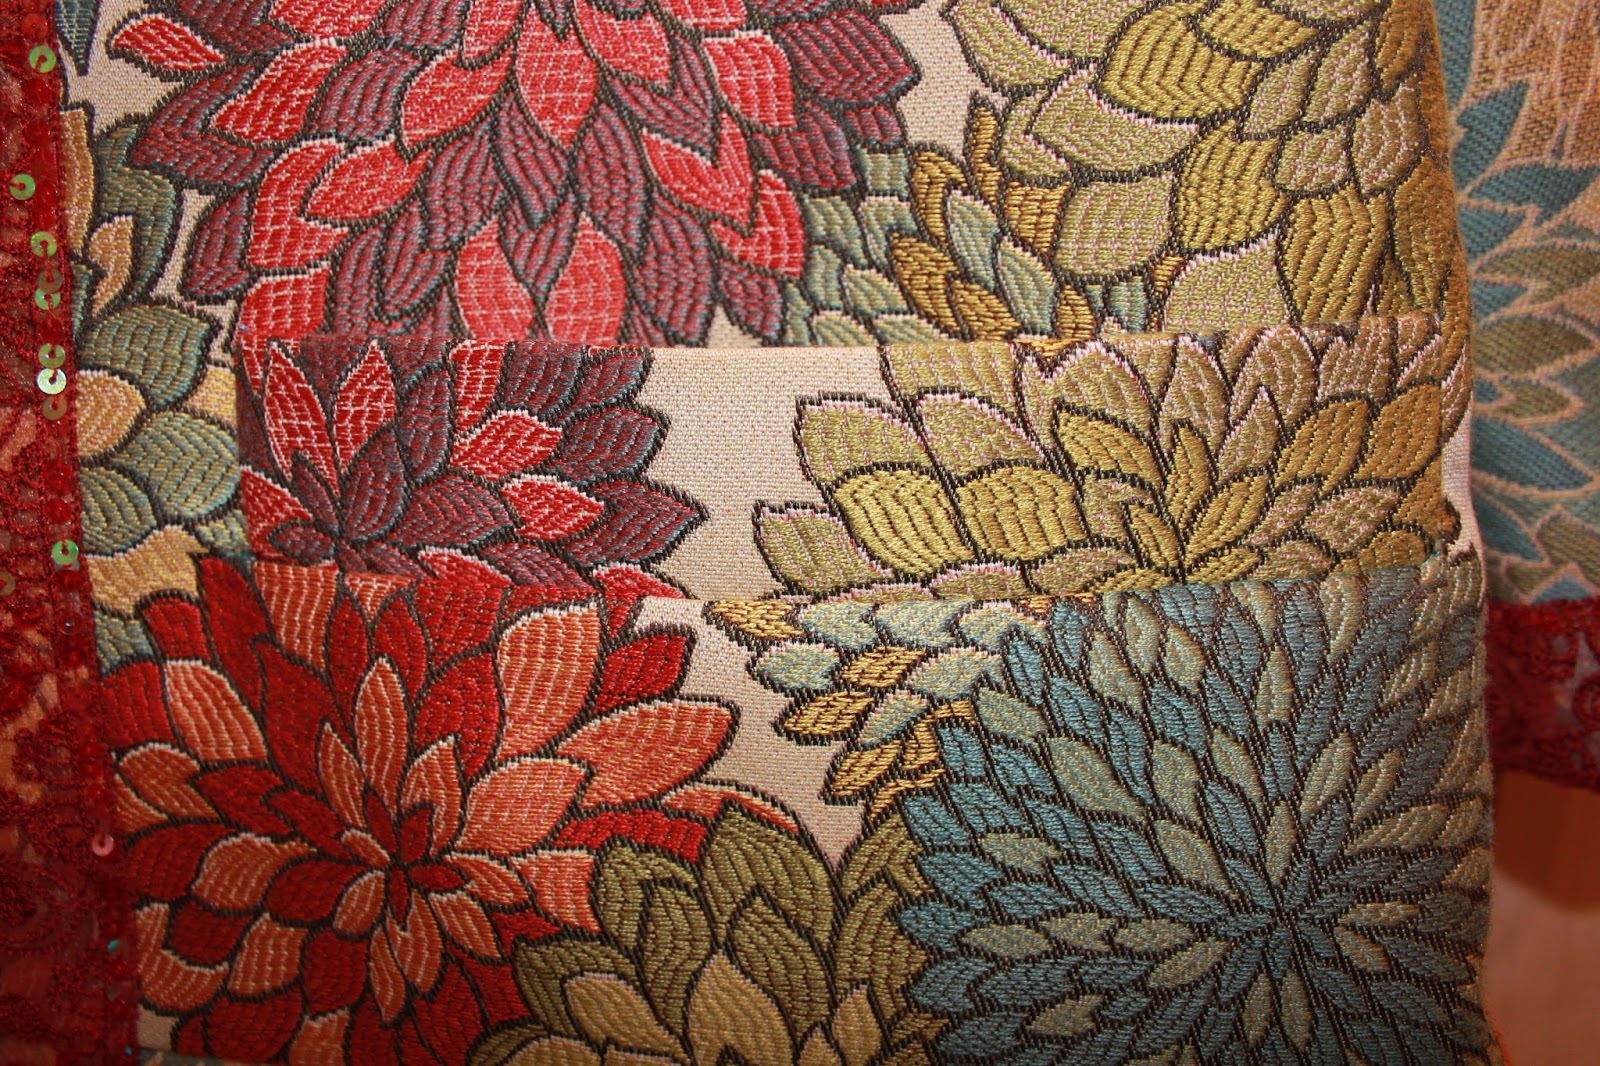
Then it was shopping time.  The coat in the original picture was a patchwork of three different materials. a green fabric with red flowers and patterns, Another more olive green with gold patterning and a contrasting turquoise blue material.  Kathy and I decided that we would try and stick with this colour palette of red, green, gold and blue as much as possible.

A trip to my local discount place  found me a couple of materials that I thought might work.  The first was a heavy weight cotton material with a neutral background colour, covered in flowers in shades of red, purple, orange, blues and greens.


One of the things I  loved about this materials was that it was reversible, with the back side being the same flower pattern in shades of  blues and golds/browns. A perfectly coordinating fabric combination.

I then found a another piece of fabric with a blue,  green and gold swirl pattern to tie it all together.


Thankfully Kathy loved my selections so we were good to go.

I started by making a muslin.  I used some horrible grey green heavy cotton material that I had bought on sale for exactly that purpose and made up a straight size 18.  After the first fitting we decided 18 was just a smidge too wide across the shoulders and a smidge too small across the hips.  I modified the pattern accordingly to fit and I was ready to get started on the real thing.

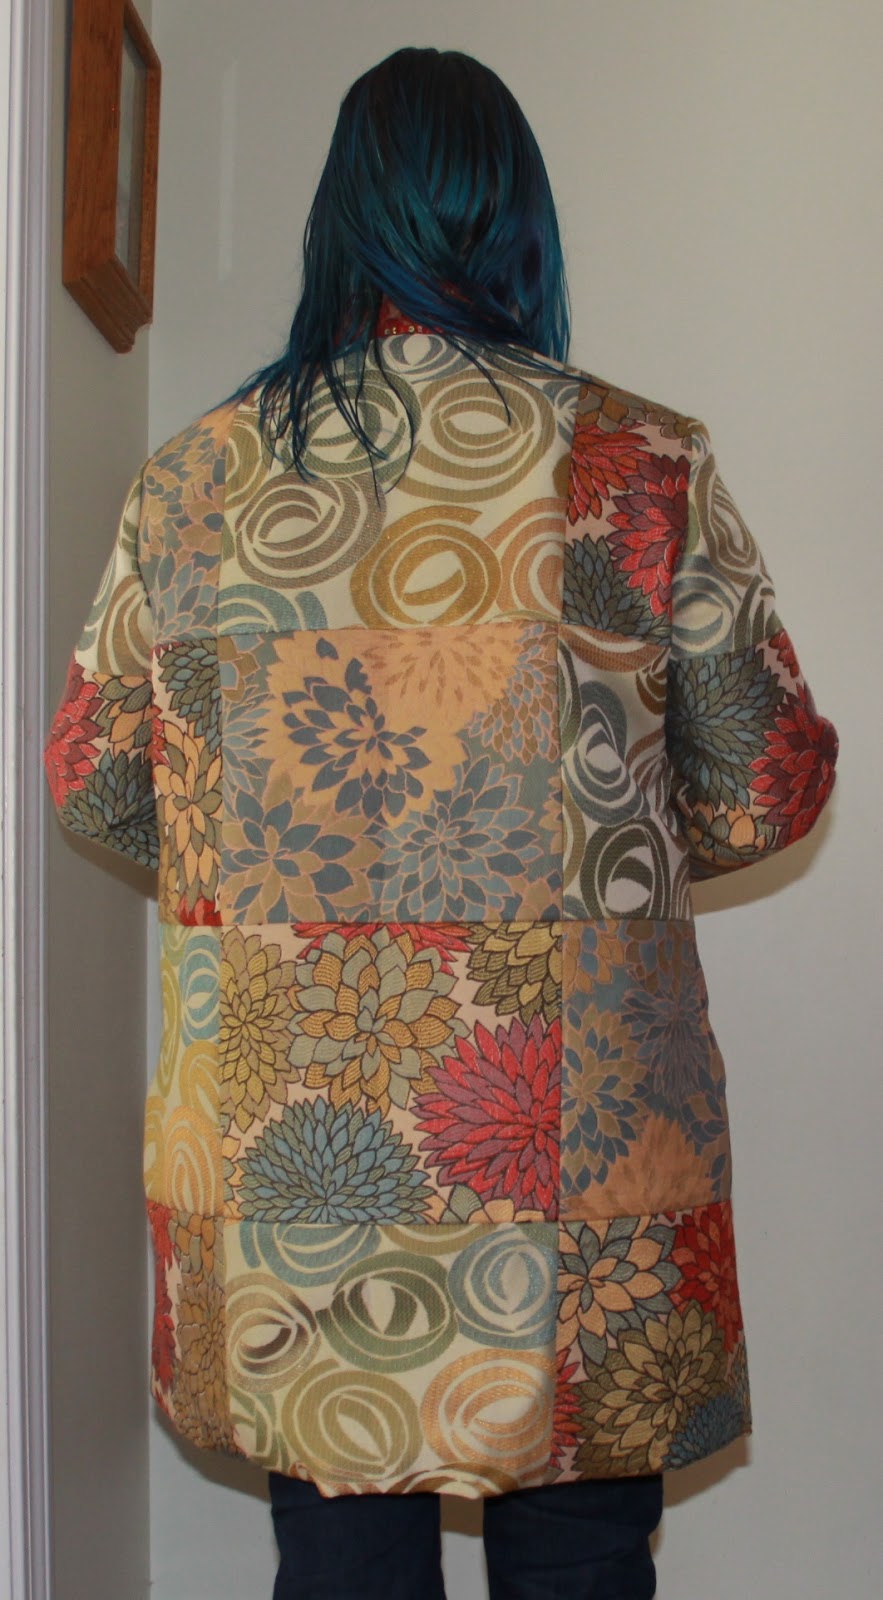
I took my pattern pieces, traced them onto a new piece of paper, and then started dividing them up into squares to create the patchwork pattern.   In the end I ended up with a 4 x 1 block down each front, and a 4 x 3 block across the back, then divided the sleeve into three equal pieces.  I allocated a material type to each piece using trial and error, trying to get an even spread of the three different fabrics.

For the front  I cut the pattern along the seam lines and retraced the pattern pieces adding seam allowances where necessary.  I then used these new pattern pieces to cut out my fabric and sewed the three pieces together to make each front section.

 For the back I cut blocks of the fabrics to the height required and an even width, then patchworked the pieces together.  I then laid the pattern over the new piece of fabric I created and cut it out.

The sleeves were done in a similar manner with the fabric cut into blocks of the right height, patchworked together, then cut to the pattern.

Once I had all the main pieces cut out the coat itself came together very easily however, as the material was quite heavy each seam needed to be pounded with a hammer and ironed with a very heavy hand after being sewed, the coat ended up taking quite a bit longer than I had expected.

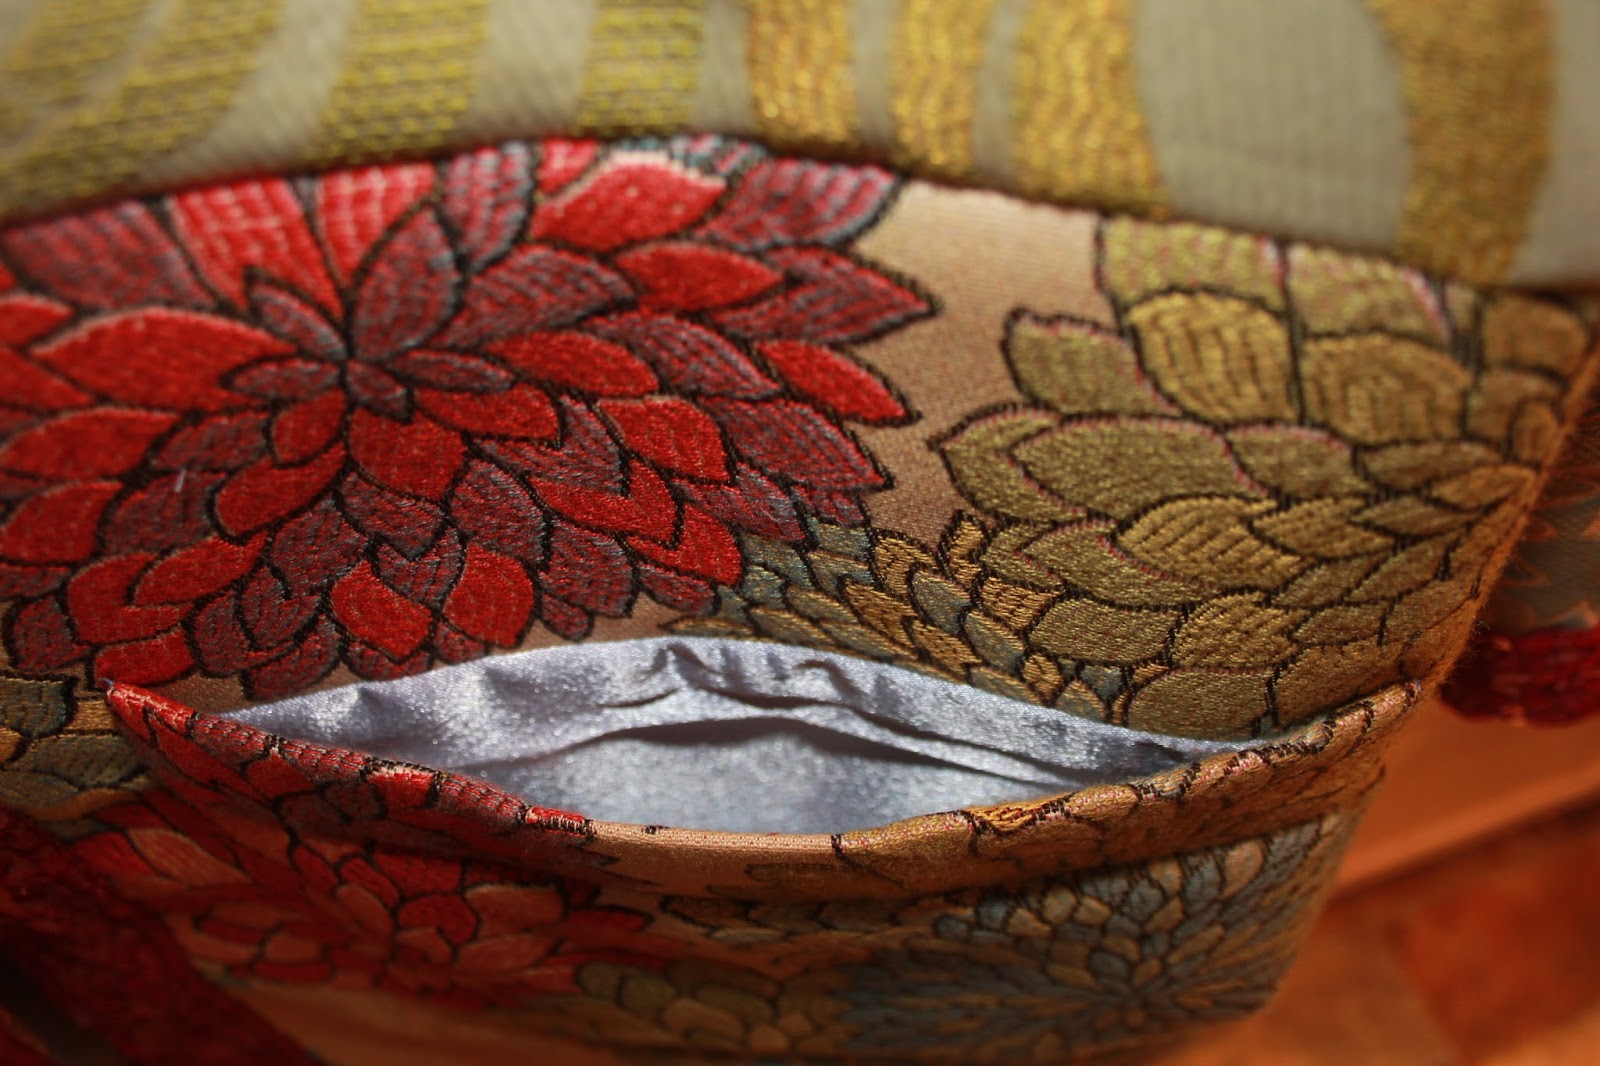
The only issue that arose during the construction of the coat was that  I was planning on putting the pockets into one of the seams across the front of the coat, however due to the size of the patchwork this would have meant the pocket was either too low down or too high up.  So in the end I decided that I would have to do welt pockets.

Now I have never done a welt pocket before so I was a bit intimidated, but I figured at least if I ruined it I could easily take out that piece of patchwork and replace it.  Still, I did do a trial on a piece of scrap fabric first before cutting into the real coat.  I went back to the trusty internet and looked up a tutorial for welt pockets and found one that I was able to follow along easily.  Good old craftsy to the rescue.  In the end my first pocket turned out pretty good, and my second one worked fantastically.  I was pretty impressed with my first welt pockets.

Can you even see it - it blends right in!


The collar (and undercollar) were cut from one of the main coat materials.  I was planning on adding interfacing to one of the collar pieces but in my hurry to get the coat complete I forgot, so there is no interfacing at all used in the coat.  Thankfully the fabric itself is stiff enough that I don't think it's a huge problem.


One thing that Kathy was worried about was whether or not she would need shoulder pads in this coat.  When we tried on the muslin I could see that she did have very sloped shoulders so once I sewed in the sleeves I decided to add some additional padding.  I was doing some internet research on sleeve heads, trying to decide whether I needed one in this coat or not when I came upon Gertie's blog post about sleeve heads.  The way she had inserted hers, like chest support, actually seemed to be what I wanted so I played around with doing something similar.  I first tried sewing two layers of my coat fabric together and shaping around the arm hole, but that got a bit bulky, so in the end I ended up using a couple of scraps of fleece that I had lying around and pretty much copying Gertie's method.
I didn't get any photos of this from the inside but I think it looks pretty good from the outside, fits nicely across the chest and shoulders.


Next step was to tackle the lining.  I found a beautiful grey/blue shimmery crepe like fabric that matched beautifully. The back and sleeves were cut using the same pattern pieces as the coat.  For the front sections I retraced the original pattern, adding in my fitting adjustments and then I cut it in a straight line about 4 inches from the front edge and added seam allowances to both pieces.  The front half of this piece was used to cut the facing out of one of my main materials and the rest was the front lining.

One of Kathy's requests for this coat was to have an inside zippered pocket where she could store her wallet, so the next step was to insert a pocket into the lining.  After my success with my welt pockets I think I got a little cocky and did this one without the benefit of a tutorial.  It didn't work quite so well...still it's not terrible so I decided to accept it and move on.


The final step was to attach the lining to the coat.  It took some fiddling around get the bottom seam to sit nicely, especially around those side slits, but after much playing it was done.


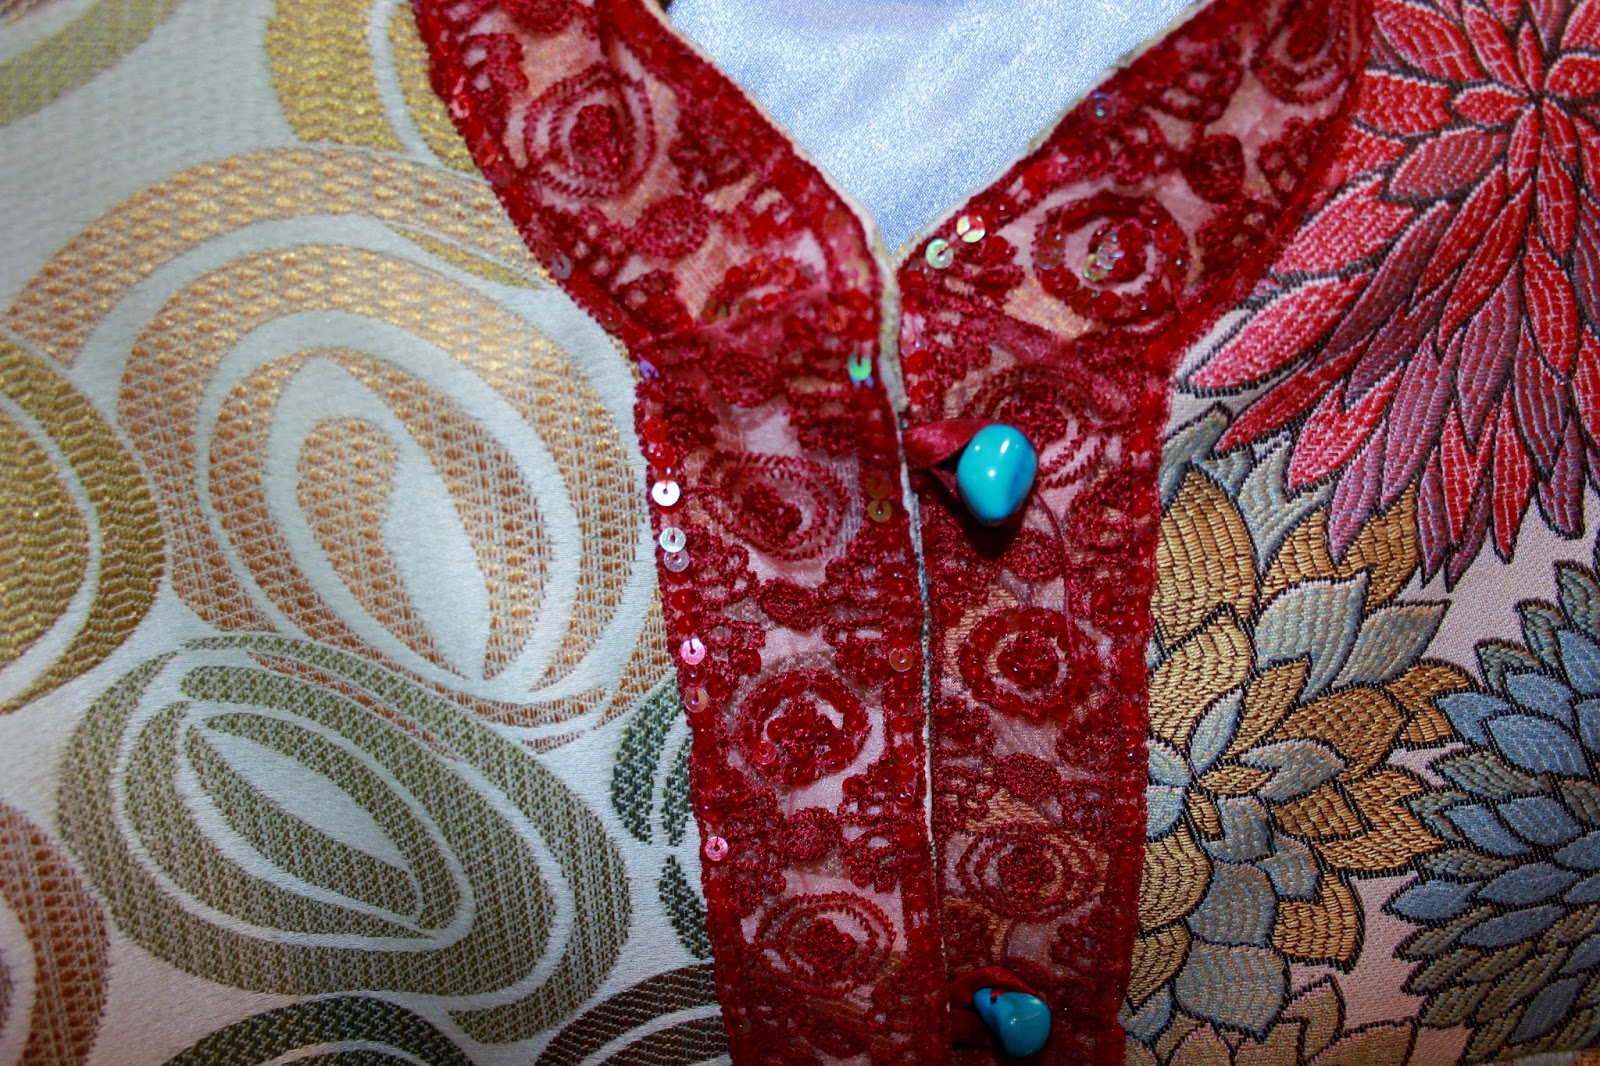
And onto the hand sewing.  I was able to find this beautiful sequined red lace in just the colour I wanted and I hand sewed it onto the coat up one front edge, around the collar and back down the other front edge.  Another piece was sewed around each cuff.


The buttons are actually turquoise beads and the button loops, in a red material to match the lace, were sewed in between the coat and the front facing.


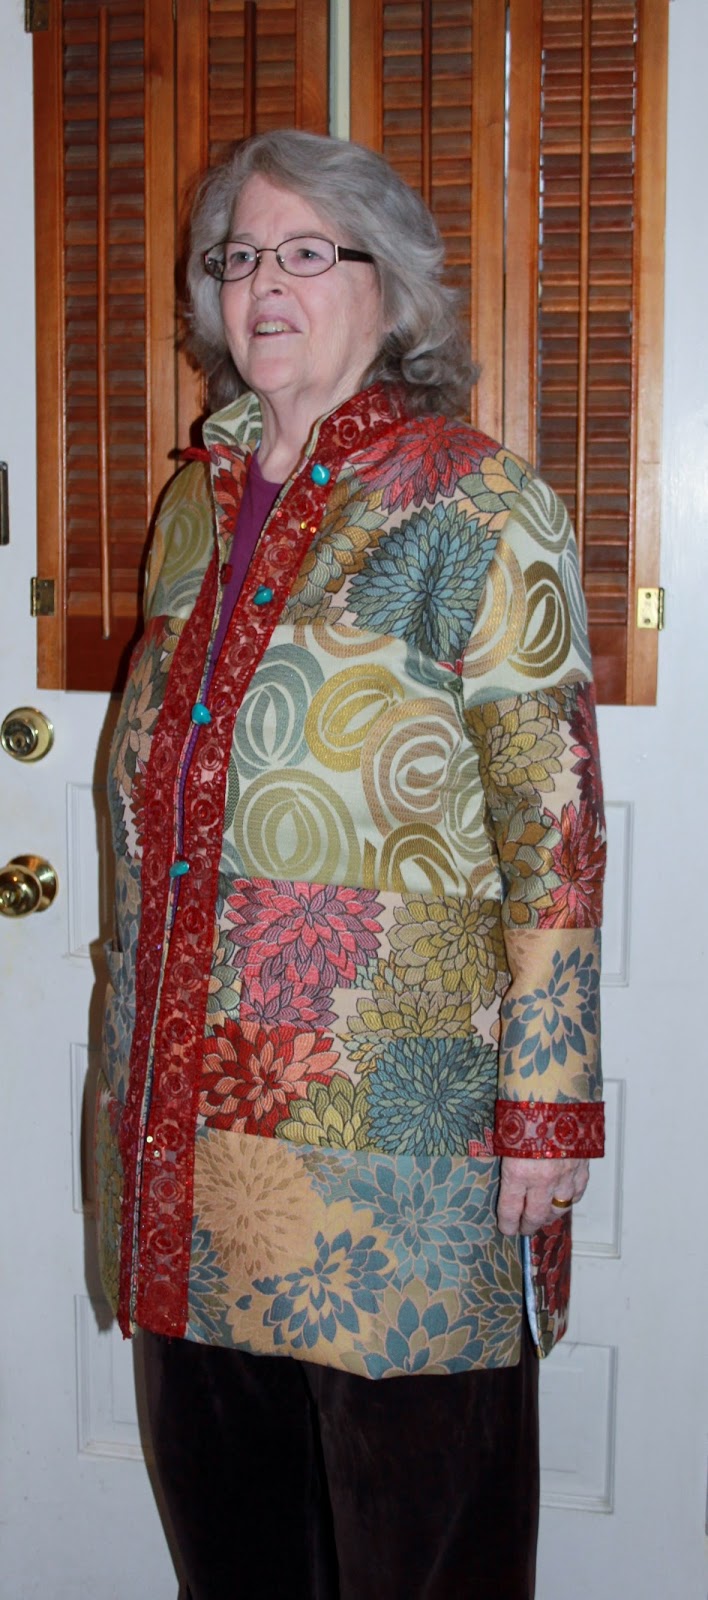
And just a few photos of me modelling the coat before handing it over, it was a bit big on me.