If I do have to say so myself this is probably my most successful "from scratch" project to date.
For a while now I've been trying to make a good sloper pattern, but thus far it has eluded me. I've attempted two times so far as documented
here and
here with no real luck. So this time around I decided I needed a new approach. I found a different tutorial on the web
here. This one seemed a bit more basic and for the first time I was able to understand exactly what each measurement was for and how to use it which allowed me to create a much better sloper. I was even able to add in a couple of additional measurements to give it a better fit in those areas where I really deviate from the normal.
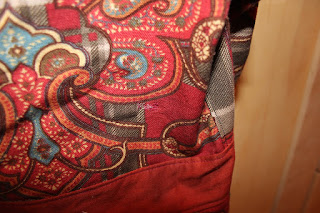
So now I have a bodice sloper and a basic sleeve (I still need to do some work on the sleeve sloper that's still not quite right) and needed something to try it out on. Over the weekend I went through and sorted out my entire fabric stash (and my yarn stash too whilst I was at it). What I found when I did this was that I have very little in the way of lightweight material. I have a bunch of cotton scraps, a bunch of knit scraps and everything else is bottom weight or heavier. I ended up back at the red paisley fabric that I blogged about
here. This is probably the lightest weight fabric of any significant length I have so I figured it was my best bet.
Now - what to make out of it? I really don't own or wear woven shirts - its knits all the way around here. I knew I'd never wear a button down type shirt but then I found the Torii Tunic Pattern from Serendipity Studios.
This is something that I would wear. I originally planned on making something similar in a tunic length, but I cut it longer just in case I needed the extra fabric and ended up liking it the length it was. Not quite long enough to be worn without leggings, but longer than a standard tunic.

I took the basic sloper and modified the single under bust dart into an under bust dart and an armhole dart. I cut out the bodice without any contrasting fabric to test the fit of the sloper and sewed it up just using a basting stitch. It ended up fitting really well, the only issue that I found was that I had forgotten to true the bottom edge of the pattern after changing the darts. Luckily I decided that for this pattern the bodice needed to be an inch shorter than I had cut it, so I was able to use that extra length to fix the issue. I also decided my sleeves were too baggy so ran them in a smidge. Once I was happy with the fit I took the entire thing apart and modified my pattern accordingly. I decided that I wanted the contrasting neckline so cut the front and back bodice piece into two and added the necessary seam lines. I then went back to my fabric and re-cut it to the new pattern pieces.

To find a contrasting fabric for the neckline, waist band and bottom I headed back to my stash. The only thing that I found that matched was a rust red linen material. It's a much lighter weight than the paisley material so I interfaced it to give it a bit more structure. Unfortunately I only had a very small piece of it, so was only able to get a waistband and the most of the neckband and facing out of it, so the bottom band had to be made from the main paisley material. For the neck band I ended up having to add a bit of the paisley material right at the very back seam to get it to fit which is not great, but really who's going to notice if I don't point it out.

To make the skirt section I cut two rectangles of the paisley material and sewed them together down the side. I pinned the side seams to the bodice side seams and then took the extra material on the back of the skirt and made it into a box pleat in center back. The front was not quite so easy to figure out. I did not want gathers - gathers around my waistline are NOT a good idea. I tried just taking out the extra fabric at the seam line and making an A shaped front piece, but it ended up too tight around the belly and I was not happy with it. In the end I went with two pleats two inches from the seam line to create a nice flat section across the front of my belly.

I was now ready to sew the thing up properly. This was the first project for me that I got to use my new overlocker that I got for Christmas on. Every seam was basted together on the sewing machine, serged on the overlocker, then topstitched for a really nice finish inside. The only exception was the very back seam where the zipper was to go. Each side of this seam was serged separately - this material frays very badly so I didn't want any exposed edges.


It was during this stage that I had my first....and then my second... accidents with the overlocker. I knew it would happen sooner or later. An extra piece of fabric got caught under the overlocker and not just stitched but cut....arggghhhh a new hole right in the front of the arm. And of course I didn't have any matching thread to fix it and the black looked terrible. After playing around with a number of different options for fixing it I just gave up and left it like this. Again, unless you know where to look a casual observer ins't going to notice it.

I put in a invisible zipper down the back - my first invisible zipper - not my best effort, but for my first, not bad.
The last step was the hem. I had made the skirt section extra long and I knew I didn't want it full skirt length, in the end all I did was turn the bottom up about 2.5" then , turned it back on itself and serged along the resulting three edges, effectively creating a 2" band around the bottom.


