


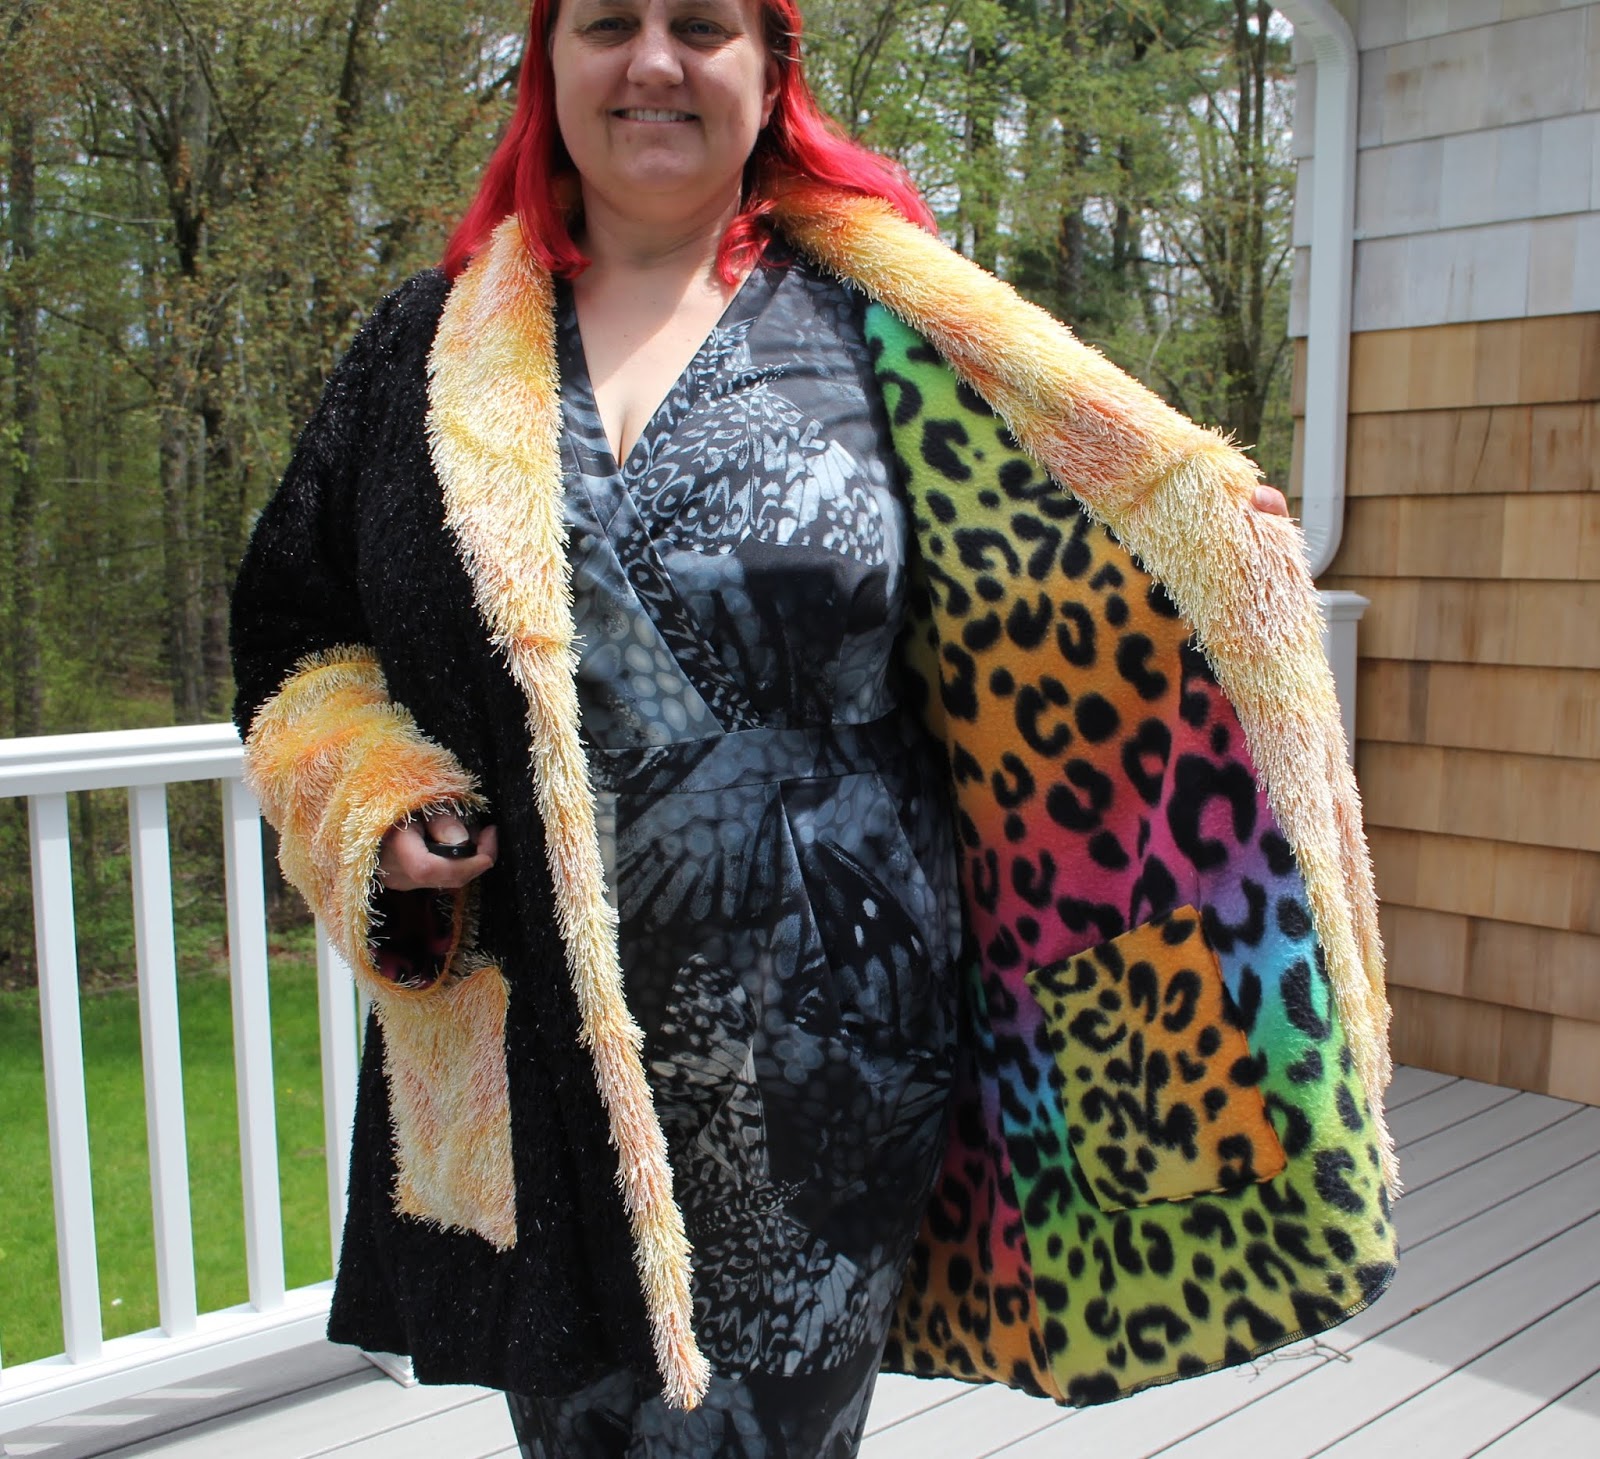
This coat actually came about thanks to one of the lovely ladies in my sewing class. One class she came in with a couple of pieces of fabric - she'd been cleaning out her stash and knew she was never going to use them and would I be able to use them? Absolutely yes. The two fabrics were the black fluffy with flecks of metallic and a yellow/orange fluffy fabric. As soon as I saw these two fabrics together I knew that they would make a wonderful coat. I just needed a pattern.
It took me a couple of months before I got around to starting on this. but during that time I was thinking about how I wanted to make this work. I went through my pattern stash but couldn't find anything close to what I was thinking of so decided in the end to draft it myself.
I started with the basic coat pattern that I created here, which in turn is based on this Burda Bomber Jacket pattern. I was pretty much able to just use the coat pattern as is for the sleeves and the back and I just had to do a few adjustments to the front to add the collar on.
To figure out the collar I turned to my favourite coat pattern Simplicity 1732. The collar is a bit too big but it was good starting point to figure out how a collar like this should go together - I then just modified the shape of it to fit the picture in my head.
Before I cut into my good fabric I decided to use some basic fleece to test the pattern. I had some wild rainbow leopard fleece in my stash and figured that would be fine - I had planned to use it as an interlining, but in the end I loved it so much it became the actual lining.

The coat was pretty good, but the collar was still a little too big so I cut it down to what I wanted and then modified my pattern pieces by the same amount. On the plus side everything lined up beautifully and went together really easily. If fact I managed to do all the drafting and the muslin in just one school day.
The next day I was ready to get started on the real material. I decided to use the back for the main body and then make the under collar and facing out of the yellow. But now I had to figure out how to treat my fluffy fabric. This fabric - while fluffy is actually not very thick. The backing is a very open weave knit fabric and there is really not that much fluff on top so its quite light weight. My original plan had been to underline it with some warm and natural to give it both extra warmth and more body, but in the end I decided to just cut it out and sew it up as is just to see what it was like. I sewed it with basting stitches only first and tried it on - and actually loved the way it draped. Ok new plan. Just use the fluffy stuff as is and the leopard print fleece as a lining.

Once I decided that the coat came together really fast. The fluffy stuff was all sewed on the machine and then the seams were overlocked to stop any further shedding which produced a very neat result. I assumed that I would have to deal with the fluff at the seam lines but this stuff was really a dream to work with and there was really not much more to do than sewing with cotton.


Now the main body of the coat was complete I wanted to think about pockets. I decided I wanted some big square patch pockets made out to the yellow fluff. To give the fluff more body I lined the pockets with pieces of scrap cotton. I thought about hand stitching the pockets in place, but after about 1" was over that idea, instead I decided to use the machine and sew right through the pockets, the body of the coat and the lining, and then decided to add a pocket onto the inside too in the same place stitched down with the same stitching. It's not my neatest work but it got the job done.

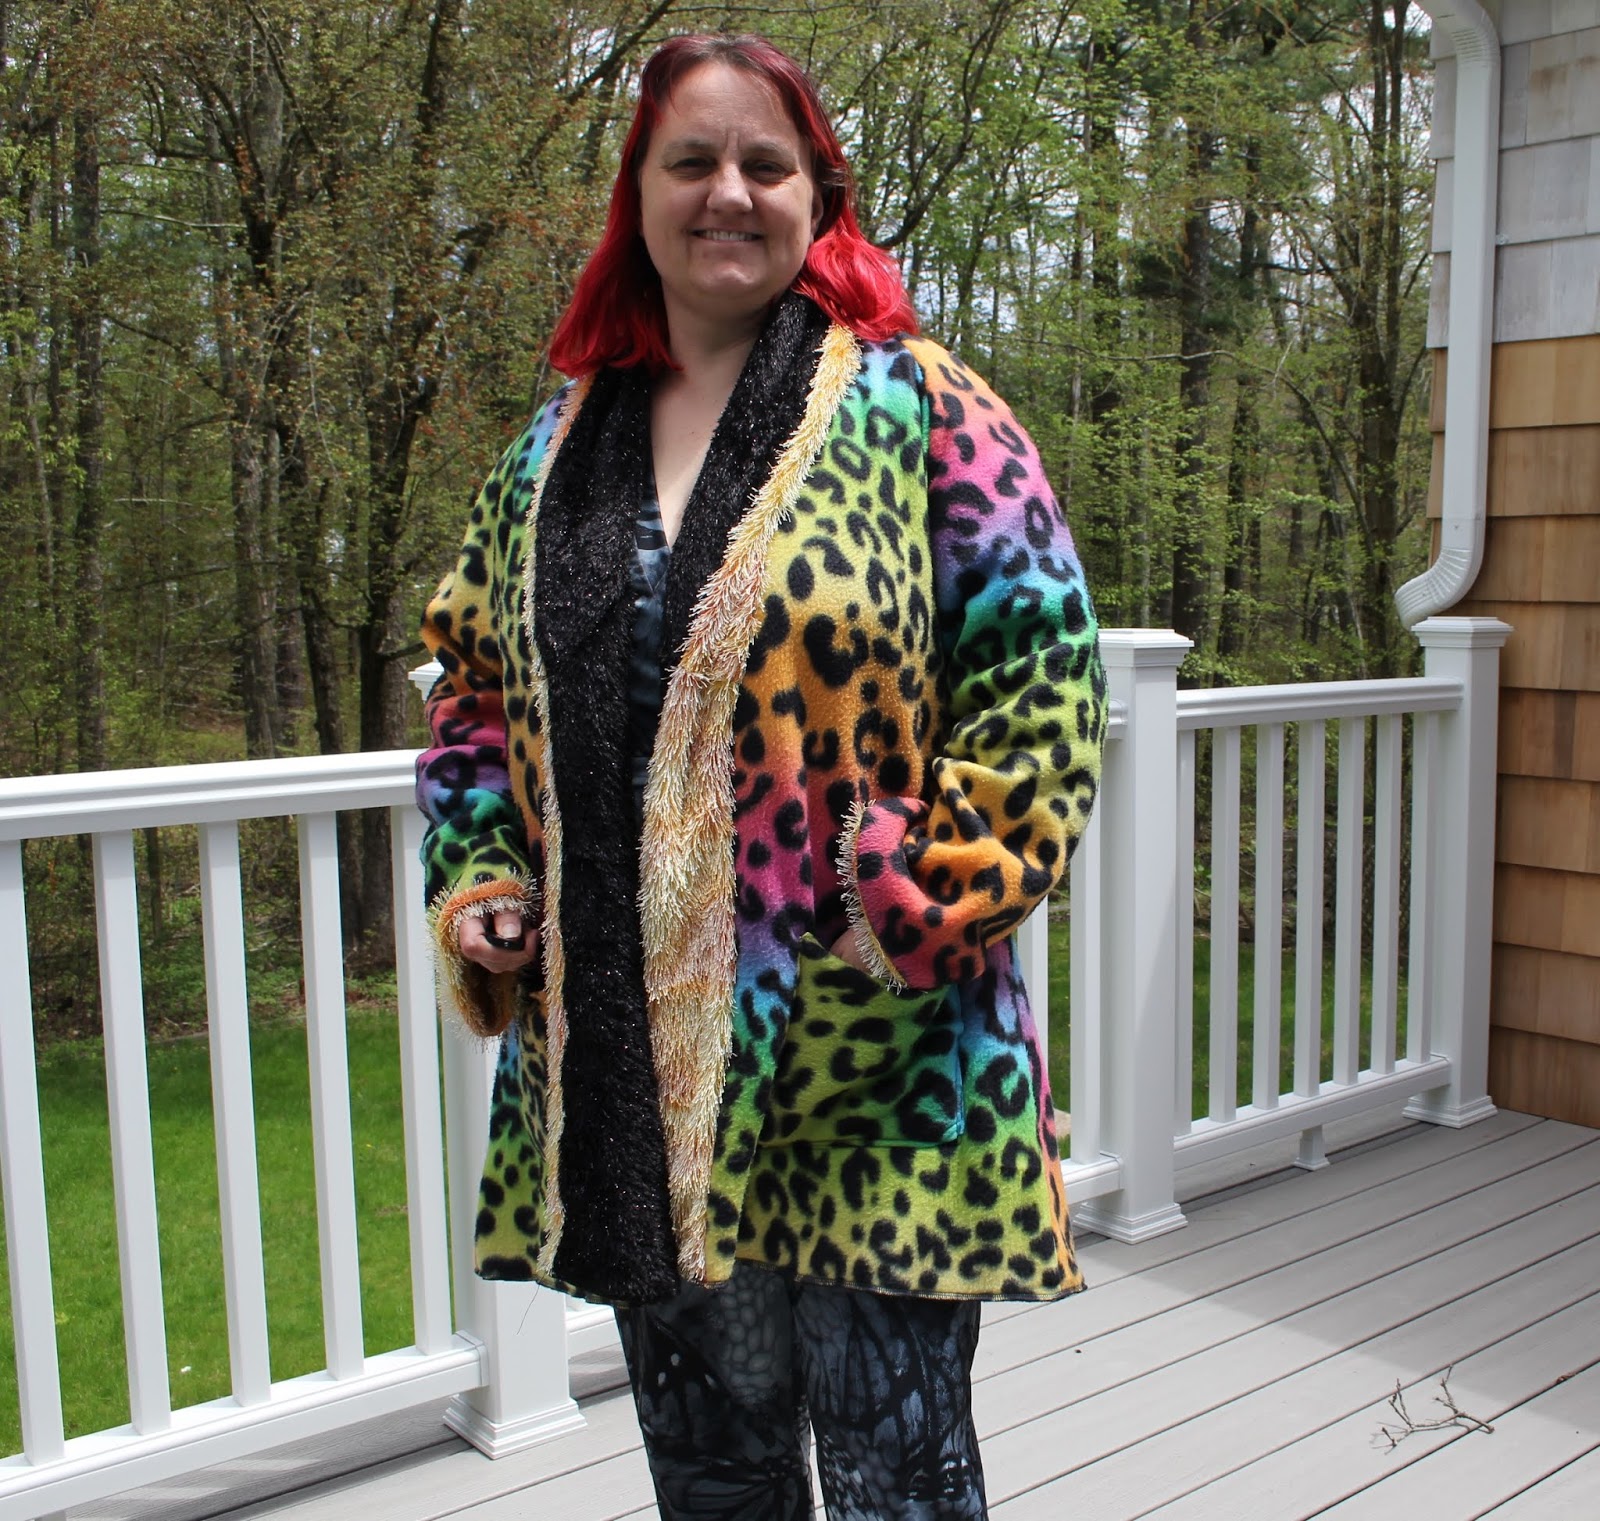
I serged the two layers together around the bottom and then pinned on a yellow band, but didn't love the way it looked. At the moment I've just left the bottom as is - I'll see after wearing this coat for a while if I want to try anything else down the bottom, maybe a smaller band?
Finally I still need a fastener for this coat. but I can't figure out what sort, especially as I want to be able to wear the coat both ways. I may just put a simple snap in at some stage, but for now I've been wearing the coat without any fastener.
No comments:
Post a Comment